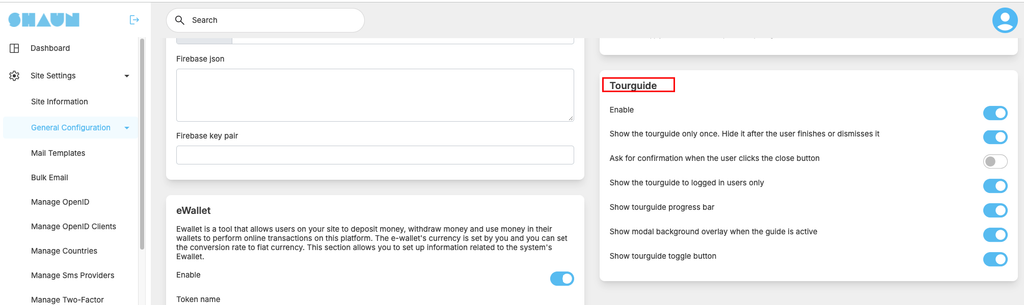
The Tour Guide plugin helps onboard new members by guiding them through the platform using step-by-step popup tours. When a user logs in for the first time (or when triggered by admin), interactive popups highlight key features and explain how to use them.
This feature is especially useful for introducing new features, UI changes, or complex workflows, helping users understand the platform faster and reducing confusion.
Please follow below steps to know to create step-by-step popup tour for a specific page on your shaunSocial site
For example, you are adding a step by step tour for the home feed page
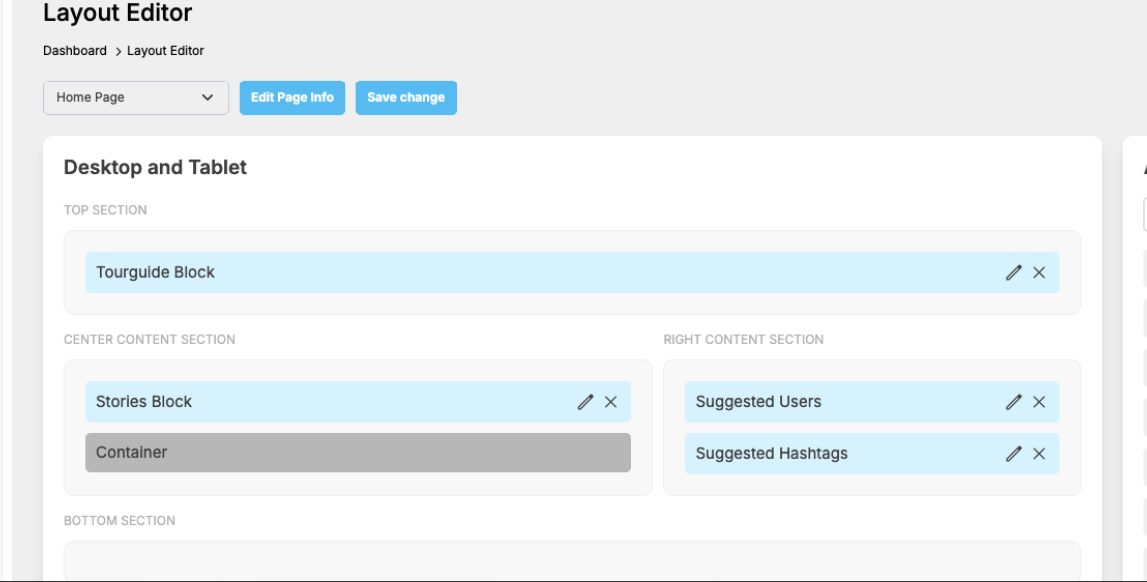
Step 1: login to admincp, go to design -> layout editor section and then drag and drop the tourguide block into the homefeed page. If you want to add step by step tour for other pages, you also need to add the tourguide block into that page also
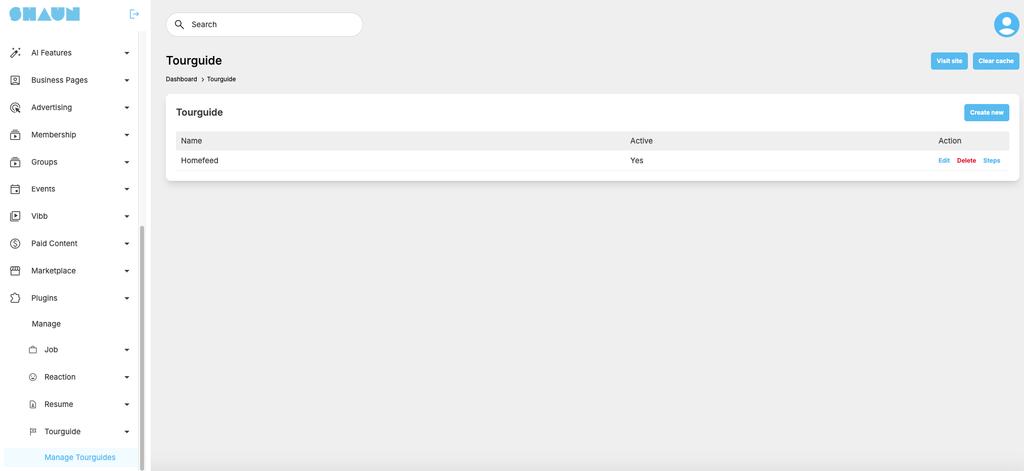
step 2: Go to the admincp-> plugins -> manage tourguides and click on “Create new” to create a new step-by-step tour
Step 3: Click on “steps” of the step-by-step tour that you just created to start adding steps for it. Click on “create new step” you will see the page below
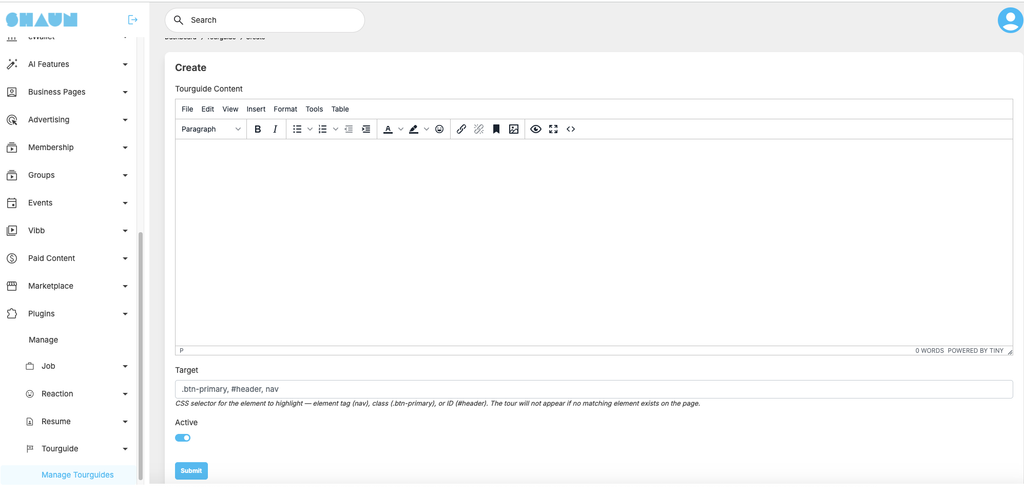
Fill in the content of the step and target. The target is the CSS selector for the element to highlight — element tag (nav), class (.btn-primary), or ID (#header). The tour will not appear if no matching element exists on the page.
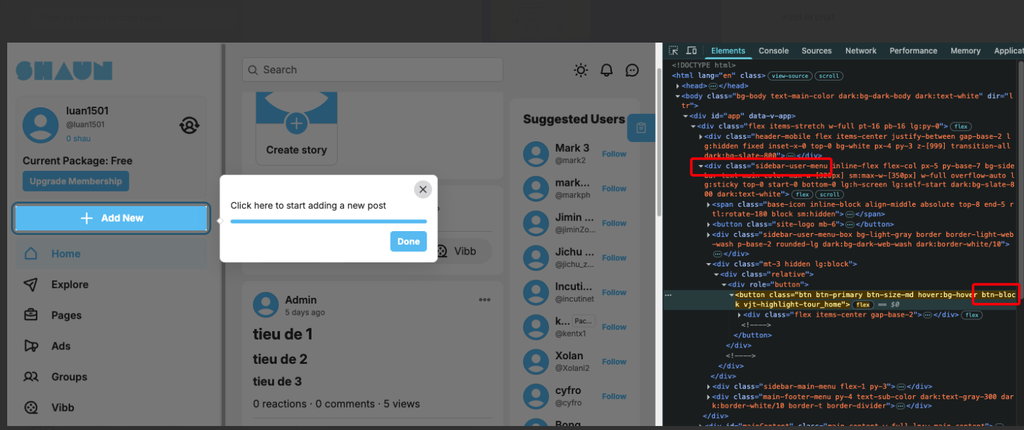
Example, i want to link the step into the “Add New” button at home page. I will use the “.sidebar-user-menu .btn-block” for target

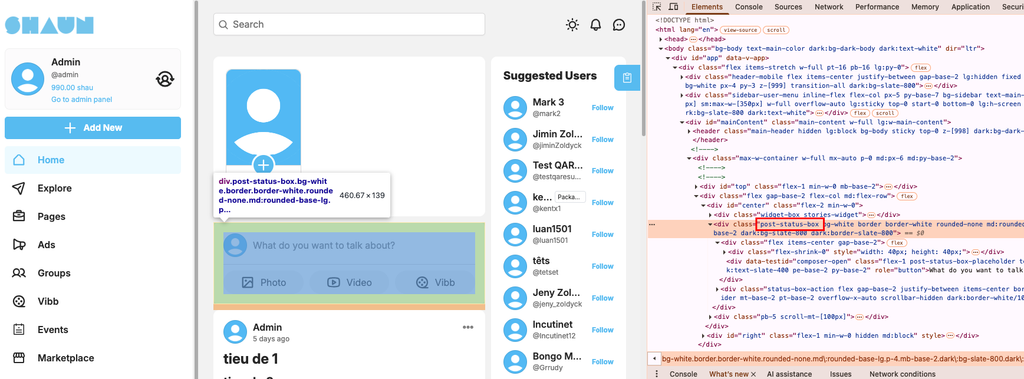
Or i want to link the step to the “Add new post” box, I will use “.post-status-box” for target

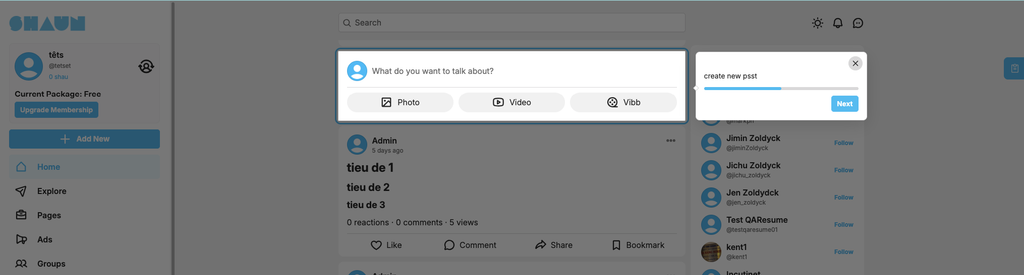
Save change and then come back to front end to check. You will see the step-by-step guides will look like this
Admin come with many settings that you can toggle to turn on/off like below screenshot