Tourguide plugin 1.1.0 / AdminCP
Tours
This page is for admins: how to write a tour and its steps, and how to put a tour on a page.
Write a tour and its steps#
Last updated: 2026-11-19 · v1.1.0
The list shows each tour's Name and whether it is Active, with Edit, Delete and Steps.

Create the tour#
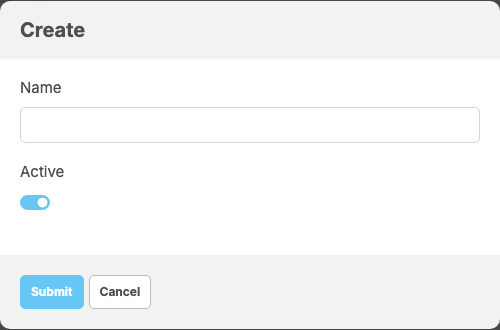
- Click Create new.
- Enter a Name (up to 255 characters; only admins see it) and leave Active on. A tour that is not active shows nowhere.
- Click Submit.
What you should see: "Tourguide has been successfully created." and the tour in the list.
Add the steps#
- Click Steps on the tour, then Create new step.
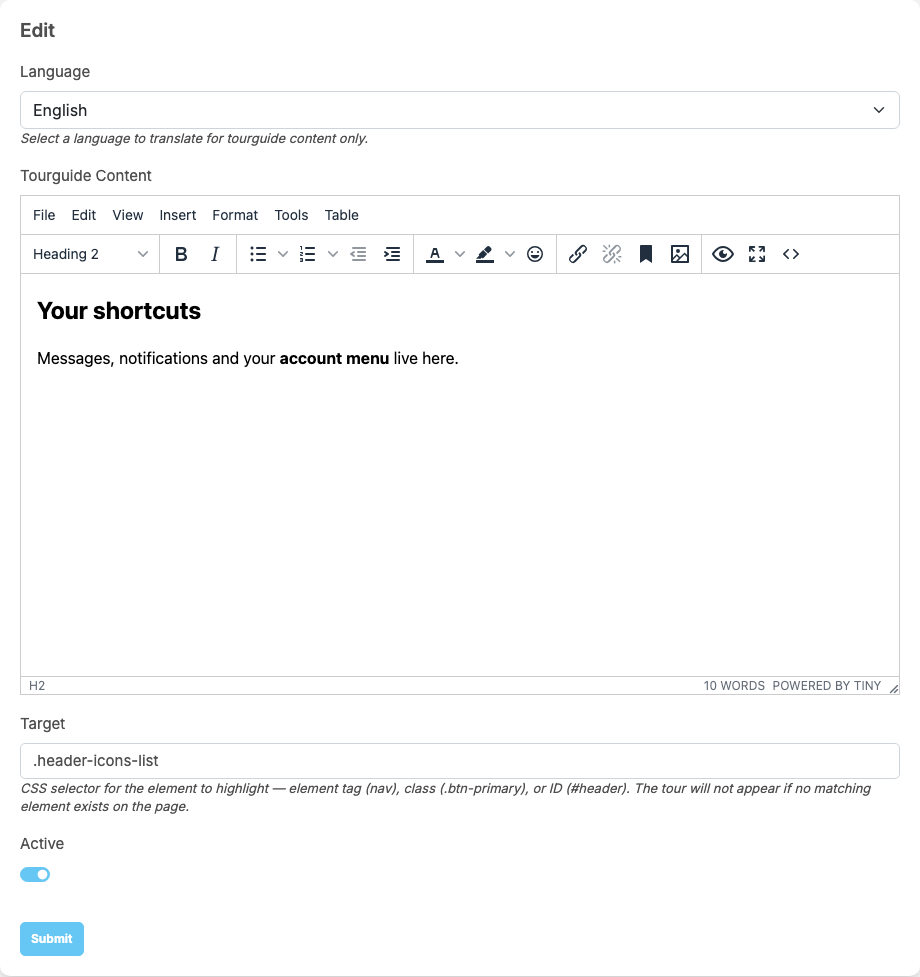
- Fill in the step:
Field What to enter Language the language of the text below. "Select a language to translate for tourguide content only." Write the step in your site's main language first; choose another language later to add its text Tourguide Content the text of the step, with headings, bold text, links or pictures from the editor. Required Target which part of the page the step points at, written as a CSS selector: the name of a page element ( nav), a class with a dot (.btn-primary) or an ID with a hash (#header). Required, up to 255 characters. "The tour will not appear if no matching element exists on the page."Active off: the step is left out of the tour - Click Submit.
What you should see: "Tourguide step has been created." and the step in the list of steps.
A CSS selector is the name your browser uses for a
part of the page. To find one, right-click the part of the page in your browser and choose Inspect; the
highlighted line shows its classes (after class=), and you put a dot before one of them. Pick a class that
appears only once on the page, and check the tour on the page itself afterwards.
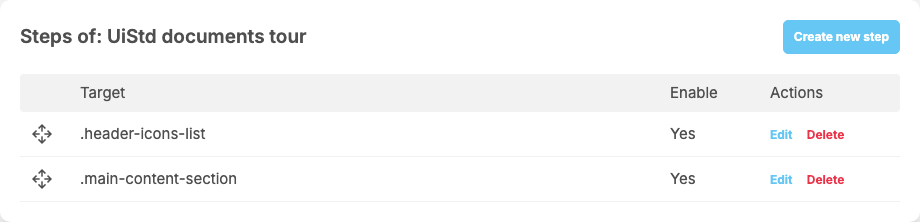
The list of steps (Steps of: …) shows each step's Target and whether it is enabled. Drag a row by its four-arrow handle to change the order of the steps. Edit changes a step, Delete removes it after a confirmation. Deleting a tour also deletes its steps.
Put a tour on a page#
Last updated: 2026-11-19 · v1.1.0
- Open the layout editor and choose the page the tour is about (see Add, change and remove blocks in the ShaunSocial guide).
- Drag Tourguide Block from Available Widgets into the page.
- In the block's window, choose the tour in Tourguide. The list shows the active tours. Set Allow Access as for any block, and click Save changes.
- Click Save change at the top of the layout editor.
What you should see: "Layout has been successfully updated." The tour starts the next time someone who may see it opens that page.
The block itself shows nothing on the page; it only starts the tour. Place it on both the Desktop and Tablet and the Mobile layout if the tour should also run on phones, and check that the targets exist in each.
Change log#
Last updated: 2026-11-19 · v1.1.0
| Date (GMT+7) | Section | What changed |
|---|---|---|
| 2026-11-19 | manage-tours, place-tour | New page. Its sections were moved here unchanged, with links to other pages updated: "Write a tour and its steps", "Put a tour on a page" (from the former page "Set up and use Tourguide"). |
| 2026-11-19 | manage-tours, place-tour | First version for Tourguide 1.1.0, written from the 1.1.0 code. The admin steps were read from the code, not run. Screenshots from a demo site running Tourguide 1.1.0 with one sample tour. |
| 2026-11-19 | all | Pages reorganised: AdminCP content now has its own pages. |