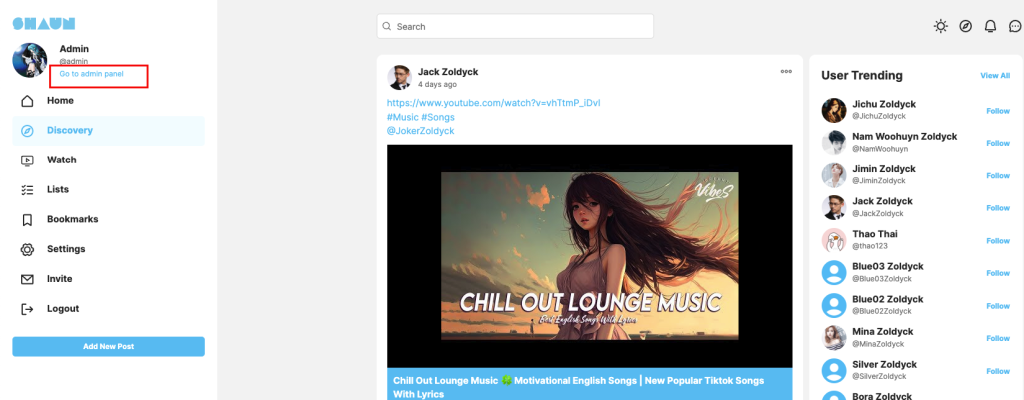
How to login to admin panel to configure site: Login as super admin account then click on “Go to admin panel” link to access admin panel of your website. For security reason, you need to enter your credentials again to access the admin area.
Why and how to clear cache when making changes in the admin dashboard: Whenever you make any changes in admin panel, you need to clear the browser cache and global cache before checking the changes at the font end.
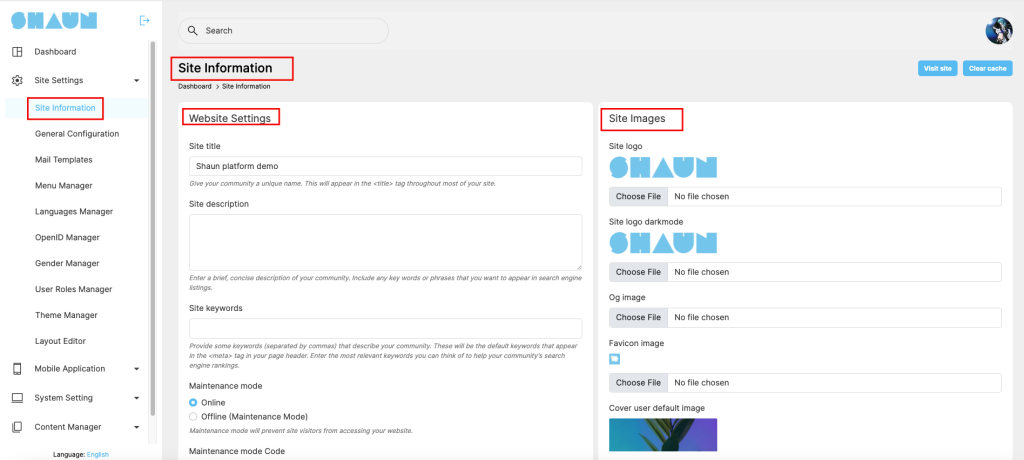
Change site name, site description, site keyword, set default timezone, default language….: All of the info can be changed
Go to AdminCP -> Site settings -> Site information
Set up SMTP to send notification & invite friends email: Smtp setting can be set up at AdminCP -> Site settings -> General Configuration.

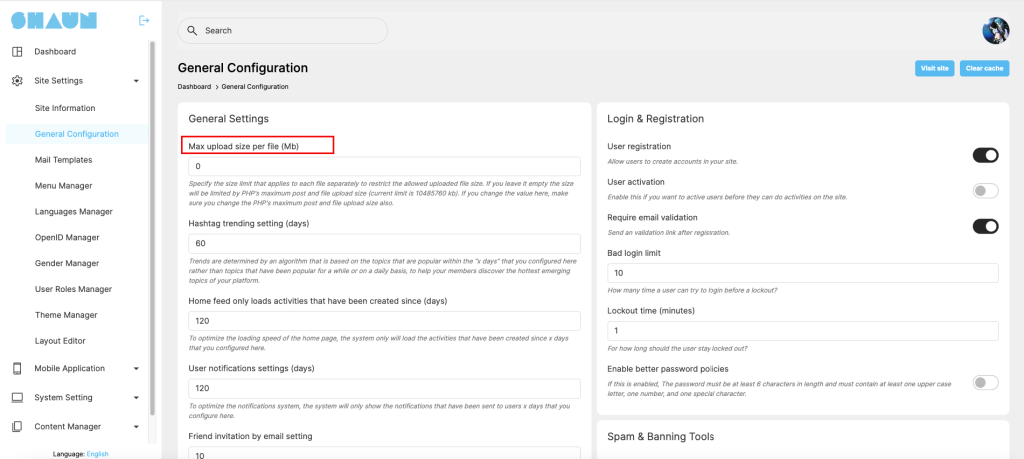
Change max upload file size: Specify the size limit that applies to each file separately to restrict the allowed uploaded file size. To change max upload size, you need to change at two places. First one is at your hosting server and the second one
Go to AdminCP -> Site settings -> General Configuration -> General Settings
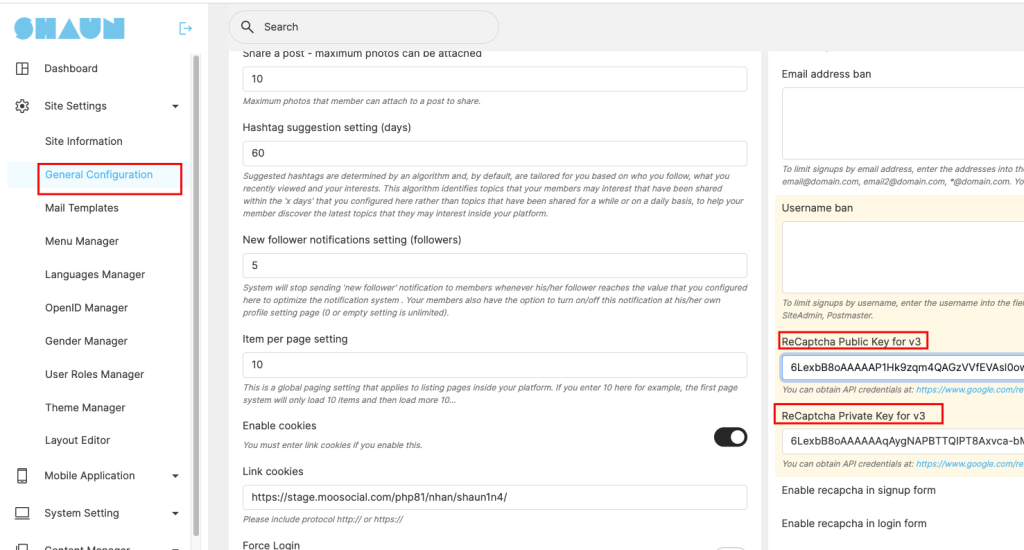
Enable Spam Protection with reCaptcha V3: reCAPTCHA is a free service from Google that helps protect websites from spam and abuse.
Go to AdminCP -> Site settings -> General Configuration -> Spam & Banning Tools
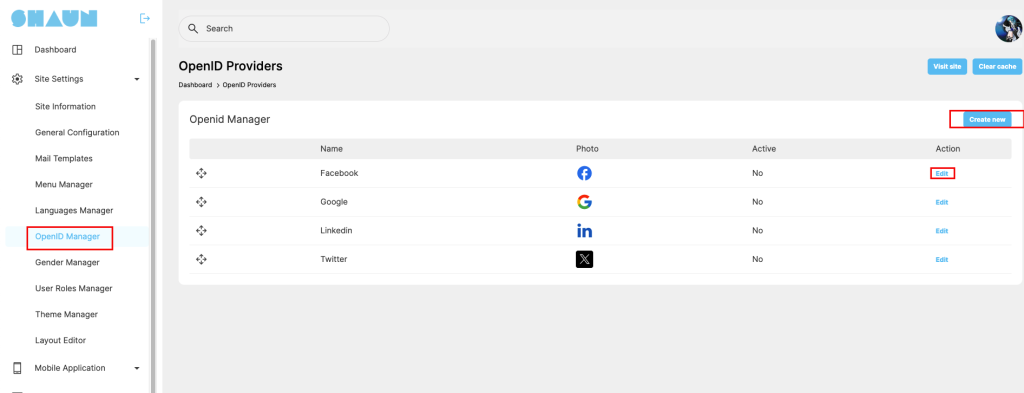
Enable social login Facebook, Google…. Through OpenID manager plugin: This plugin enables login into your Shaunsocial site using any custom OAuth and OpenID Connect providers and standard providers. It supports advanced SSO features like user profile attribute mapping, name mapping etc.
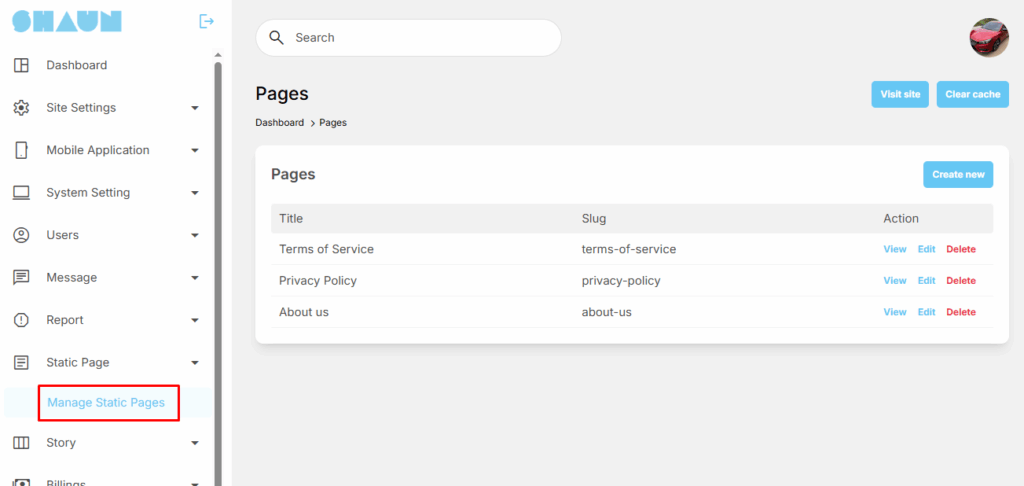
Change content about us, site policies, terms of services: It’s importance to update the content of “About us”, “Site policies” and “Term of services”,
Go to AdminCP -> Static Page -> Manage Static Pages
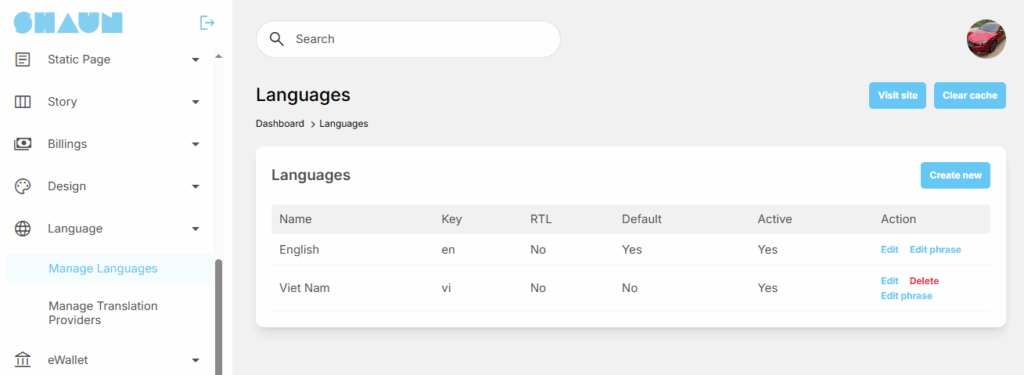
Install new language: Shaun is multi-language support so that you can add new language package for it and can edit phrases to translate to your desired languages
Go to AdminCP -> Languages -> Manage Languages
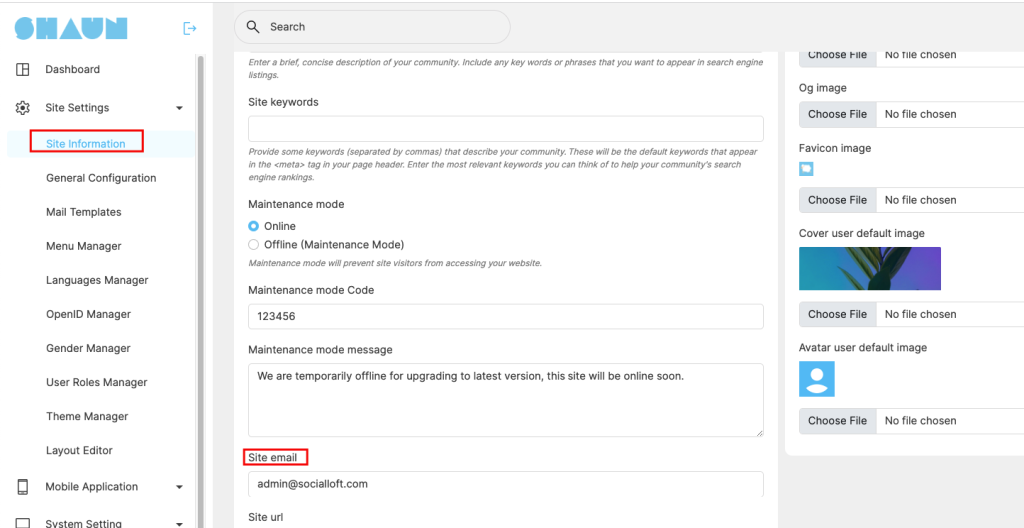
Setup email of “contact us” form: The email that you configured at installation step is the one that will get the email if the user submitted the contact us form. You can change it at
Go to AdminCP -> Site settings -> Site information -> Site email
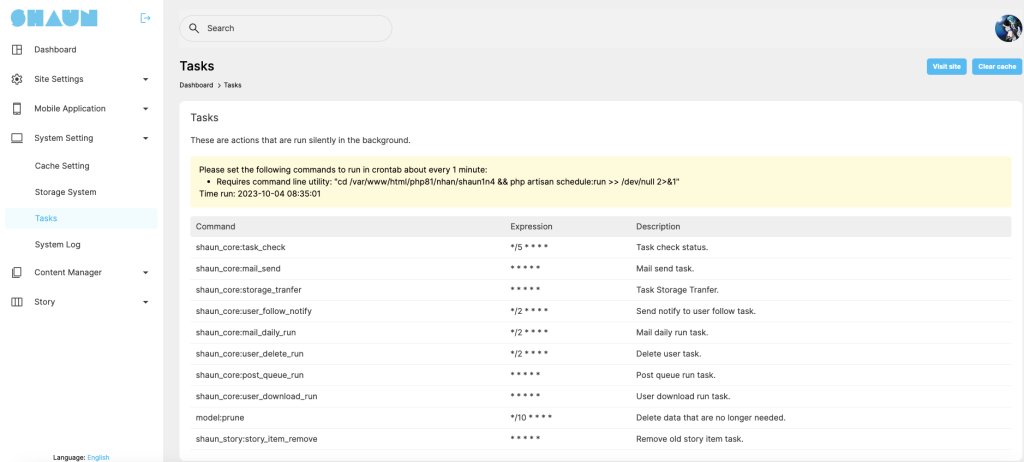
Setup Cron: It’s important to set up it because many features require cron to work properly. You can do this at AdminCP -> System settings -> tasks.
Manage menu: Shaun provides you an advanced menu management system to allow you to arrange the menu according to your needs.
Go to AdminCP -> Design -> Manage Menus.

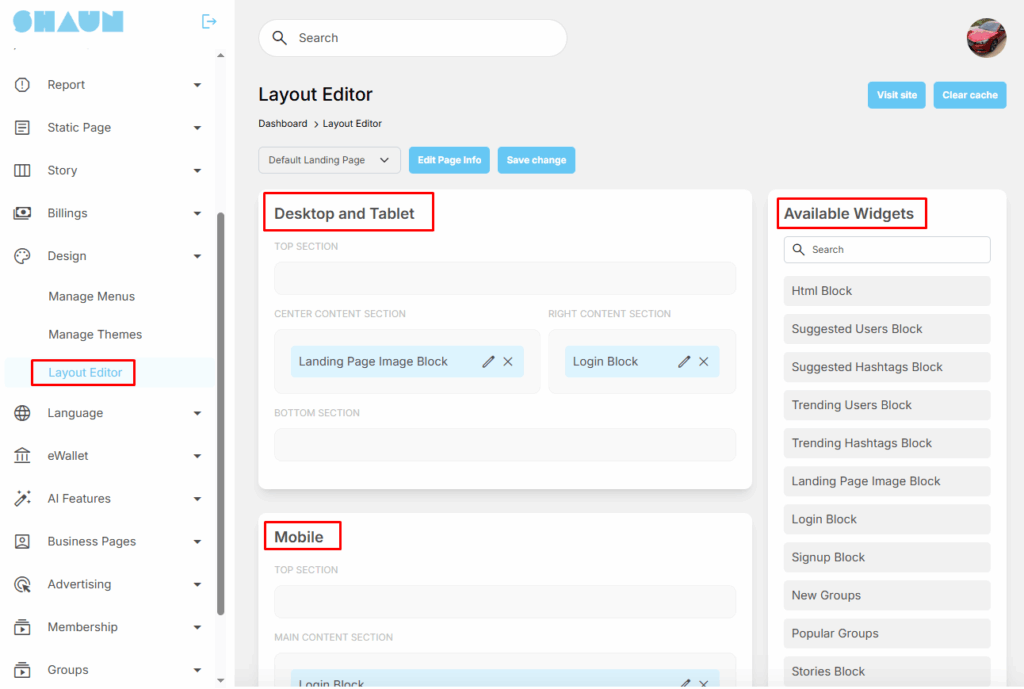
Layout editor: The layout editor allows you to arrange blocks at header, footer, left and right to suit your needs. You can add/remove existing blocks into any pages.
Go to Go to AdminCP -> Design -> Layout Editor
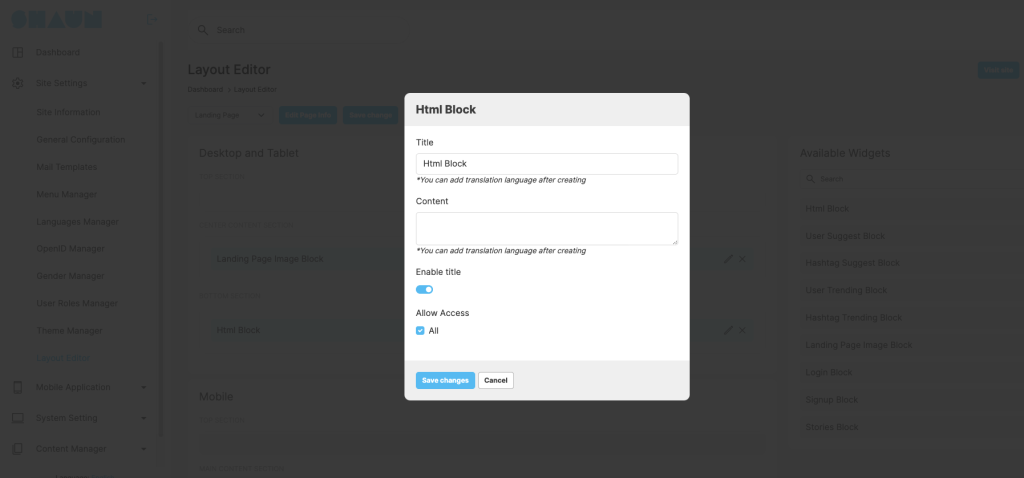
Add Adsense Ads Widget: You can monetize by placing the ad banner from google or any provider through the html block. See below screenshot for more details
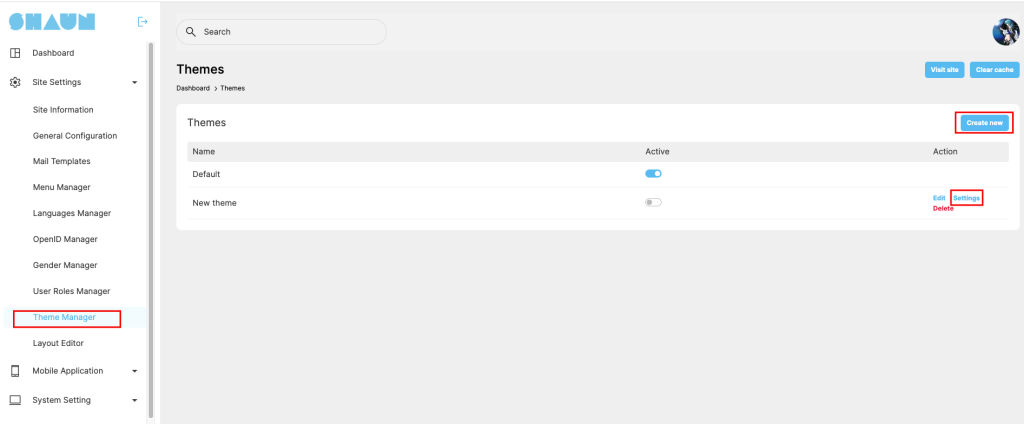
Change color of the active theme: Does not allow you to change color of the default theme, to change the color, please create a new theme and then click on “Settings” to change color according to your needs.
Go to AdminCP -> Design -> Manage Themes -> Settings