You Can change the default main menu, footer menu and mobile apps main menu to make them suitable with business model of your site. This tutorial will show you how to do that.

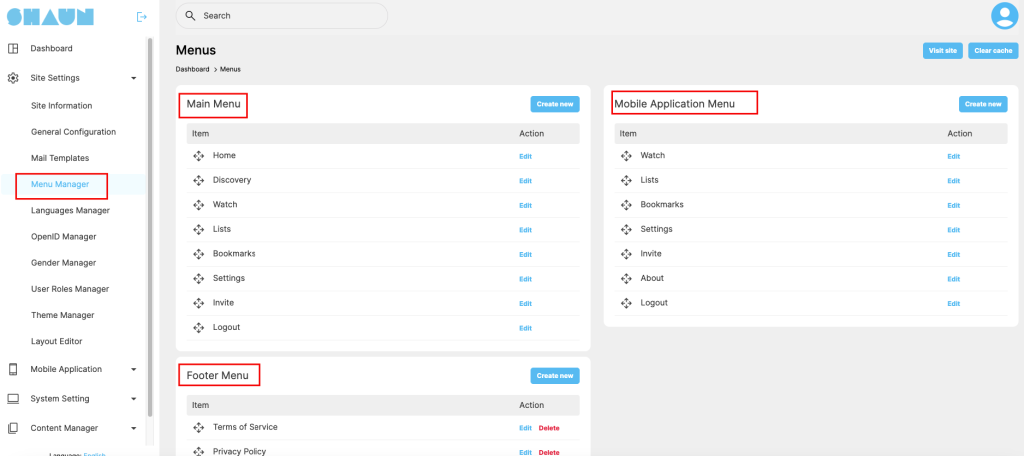
Go to admin dashboard -> Site settings -> Menu manager, you will see the above screenshot.
Main menu: Is place where you can manage the main menu of the web site. You can edit existing menu, drag and drop to change order of menu or click on “Create New” button to create a new menu.
Footer menu: if you want to customize the footer menu, please do that here
Mobile application menu: this is section for you to control the menu of the mobile apps.
How to add a new menu?
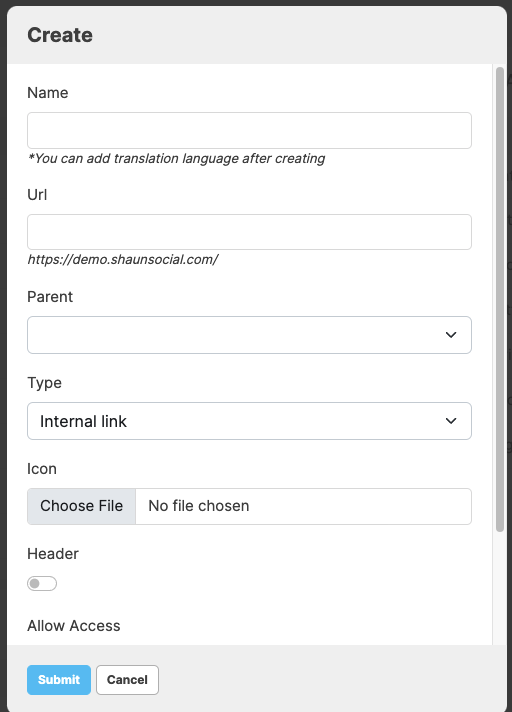
Click “Create New” button to start adding a new menu. You will see the screenshot below

Name: Enter the name of the menu, this name can be translated if you site have more than ONE language
URL: is the url that links with the menu that you’re adding
Parent: is the menu that the link you’re adding to will be under
Type: there are two types, the first on is Internal link. If you want to add a link that is inside your own site. Go with this type. If the link is from other website, please go with outbound link type
Icon: that will appear next to the menu
Header: if you select this option, it will be the header of the menu. If you plan to create a main menu that has many sub-menu under it please select this option.
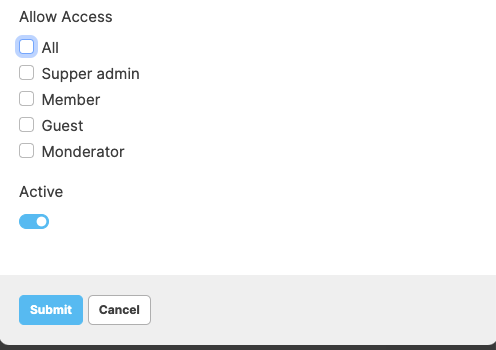
Allow access: you can set permission for with user role can access the menu.

Active: if you want to create a new menu but don’t want to display it with end users yet. Please enable this option.
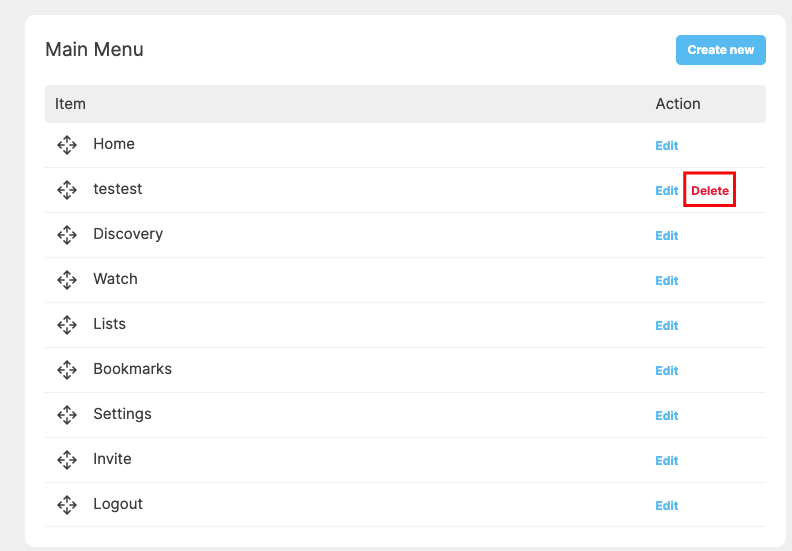
How to delete an existing menu?
The default menu can’t be deleted. The one that is added by you can be delete by clicking on the “Delete” action.


