ShaunSocial user guide 1.5.6 / Getting started
Install
This page takes you from the downloaded package to a working ShaunSocial 1.5.6 site. Most of it happens in your browser. A few steps happen in your hosting control panel or on the server; where a step needs a server command, it is in a box marked For your server administrator, so you can hand it to whoever runs your server.
Before you start#
Last updated: 2026-11-17 · v1.5.6
What you need#
- Web hosting (a server or a hosting plan) that runs PHP 8.3 or newer. The next section lists everything it must have.
- A database: MySQL or MariaDB. Your hosting control panel can usually create one.
- The ShaunSocial 1.5.6 package, a zip file from where you bought ShaunSocial (usually your ShaunSocial client area).
- Your domain, for example
example.com, already pointing at your hosting, ideally with an HTTPS certificate. - Optionally, an e-mail account for sending (an SMTP account). Your site can send its sign-up and password e-mails through your server's own mail program, but an SMTP account from your e-mail provider is usually more reliable. You can add it after installing.
Two ways to install#
In your browser (recommended)
Upload the files, open your site, and follow four screens: check the server, connect the database, name your site, create your admin account.
From the command line
For server administrators who set up sites with scripts or containers. Same result.
What keeps running after the install#
| What | Do you need it? | Where to set it up |
|---|---|---|
| A scheduled task (a "cron job") that runs every minute | Yes, always. It sends queued e-mails, cleans up old data, renews subscriptions, builds the sitemap and more: 32 jobs in all | Set up the cron job |
| E-mail sending | Yes, for sign-up and password e-mails; it works with your server's mail program, an SMTP account is optional | Set up e-mail |
| Live updates (chat, comments, notifications appear without reloading) | Optional | Live updates |
| Video processing (FFmpeg) | Only if members may upload videos or send voice messages: without it every video upload is refused | Optional extras |
| A background queue worker | Only for large sites that switch it on | Background queue |
Check that your hosting is ready#
Last updated: 2026-11-17 · v1.5.6
If you are not sure about any line, send this section to your hosting provider and ask them to confirm it.
| What | Needed |
|---|---|
| PHP | version 8.3 or newer. On an older PHP the site, and the installer itself, will not open |
| Database | MySQL 5.7 or newer, or MariaDB 10.3 or newer (older versions cannot store some of ShaunSocial's data), with an empty database and a user that has all rights on it |
| Web server | Apache or Nginx. Your domain must point at the public folder of ShaunSocial (see Point your domain at the public folder) |
| HTTPS | strongly recommended for a live site; the mobile apps and browser notifications need it |
| Upload size | large enough for the biggest photo or video your members may upload |
PHP 8.3+ for both PHP-FPM and the command line (same version). PHP extensions:
- Checked by the installer:
openssl,pdo,mbstring,tokenizer,json,curl,gd,zip,exif,fileinfo. - Also required (not checked by the installer):
pdo_mysql,ctype,dom,filter,hash,iconv,libxml,pcre,session,simplexml,sodium. Withoutpdo_mysqlthe installer cannot connect to the database. - Optional:
imagick(HEIC photos from iPhones, blurred previews of paid posts),redisormemcached(only if chosen as the cache in the AdminCP).
proc_open and symlink must not be disabled. Set upload_max_filesize and
post_max_size at least as large as the AdminCP upload limit, and max_execution_time long
enough for big uploads (100M and 300 seconds are reasonable starting values). Database: InnoDB, character set
utf8mb4, collation utf8mb4_unicode_ci. Apache needs mod_rewrite (and
mod_headers for browser caching) with AllowOverride All. Composer and Node.js are not
needed: the package includes its libraries and the built web app.
php -v
php -m
PHP 8.3.x (cli) ...
...
curl
exif
fileinfo
gd
...Optional extras#
- Videos and voice messages. Members can upload videos (in posts, stories, Vibb and Marketplace
listings) and send voice messages in chat only when FFmpeg is set up; until then every such upload is refused with
"You can not upload video.". Ask your host to install FFmpeg, then switch it on in AdminCP → Site Settings → General
Configuration → FFMPEG Configuration: tick FFMPEG system and fill in FFMPEG binary file path (for
example
/usr/bin/ffmpeg). It is off after installing. Details: FFmpeg on the Server services page. - A faster cache. Redis or Memcached can replace the default file cache: AdminCP → System Setting → Cache Setting.
Download the package and upload the files#
Last updated: 2026-11-17 · v1.5.6
- Download the 1.5.6 package (a zip file) from where you bought ShaunSocial, usually your ShaunSocial client area. For a new site always take the newest version.
- Upload the zip to your hosting, into the folder your site will live in, and unzip it there. In most control panels: File Manager → upload → right-click the zip → Extract. The files sit at the top of the zip, with no folder around them.
- Check that the hidden files came along:
public/.htaccessand.htaccessstart with a dot, and some FTP programs skip such files unless you tell them to show hidden files. Upload the wholestoragefolder too, even though its folders look empty. - Check the version: open
public/version.txt.What you should see:
1.5.6.
The package does not contain a .env settings file: the installer creates it.
mkdir -p /var/www/shaunsocial
unzip shaun-core-1.5.6.zip -d /var/www/shaunsocial
cat /var/www/shaunsocial/public/version.txt1.5.6Use the name of the downloaded file; the release build names it shaun-core-1.5.6.zip.
Prepare your hosting#
Last updated: 2026-11-18 · v1.5.6
Create a database#
- In your hosting control panel open MySQL Databases (or similar) and create a new, empty database, for
example
shaunsocial. - Create a database user with a strong password and give it all privileges on that database.
- Write down the database name, the user name, the password and the database host (often
localhostor127.0.0.1). The installer asks for them.
CREATE DATABASE shaunsocial CHARACTER SET utf8mb4 COLLATE utf8mb4_unicode_ci;
CREATE USER 'shaunsocial'@'localhost' IDENTIFIED BY '<your-db-password>';
GRANT ALL PRIVILEGES ON shaunsocial.* TO 'shaunsocial'@'localhost';
FLUSH PRIVILEGES;
Point your domain at the public folder#
The document root is the folder your web server shows when someone opens your domain. For
ShaunSocial it must be the public folder inside the files you uploaded, for example
/var/www/shaunsocial/public, not the main folder. In most control panels you set it under
Domains → your domain → Document root.
If your hosting does not let you choose the document root, see Hosting that cannot use the public folder.
Let the site write its folders#
The site saves uploads, settings and language files, so the web server must be allowed to write to some folders. The installer's first screen shows a red mark for some of these problems, but it cannot see all of them: make sure your host gives write access to every folder in the list below, even when the screen is all green.
The user PHP runs as (here www-data) must be able to write:
| Path | Why |
|---|---|
storage/ (all of it) | uploads, cache, sessions, logs. The installer only compares its permission number with 755; it does not test that PHP can really write there |
bootstrap/cache/ | caches and the list of installed plugins. Same check as storage/ |
| the site folder itself | the installer creates .env there; changing Site url in the AdminCP updates it |
public/ | the installer creates the public/storage link |
lang/, public/locales/ | language files, edited in AdminCP → Language |
public/themes/ | themes made in AdminCP → Design → Manage Themes |
packages/shaunsocial/, resources/js/plugins/, public/plugins/, public/images/, public/admin/js/ | only if you install plugins from the AdminCP |
chown -R www-data:www-data /var/www/shaunsocial
find /var/www/shaunsocial -type d -exec chmod 755 {} \;
find /var/www/shaunsocial -type f -exec chmod 644 {} \;
chmod 755 /var/www/shaunsocial/artisan
Web server settings (Apache)#
On Apache the package brings its own rules file (public/.htaccess); Apache only has to be allowed to
read it. Most shared hosting already allows this.
<VirtualHost *:80>
    ServerName example.com
    DocumentRoot /var/www/shaunsocial/public

    <Directory /var/www/shaunsocial/public>
        AllowOverride All
        Require all granted
    </Directory>

    ErrorLog ${APACHE_LOG_DIR}/shaunsocial-error.log
    CustomLog ${APACHE_LOG_DIR}/shaunsocial-access.log combined
</VirtualHost>
a2enmod rewrite headers
a2ensite shaunsocial
apachectl configtest
systemctl reload apache2Syntax OKThe rules file passes the Authorization header to PHP, removes trailing slashes, sends every request
that is not a file or folder to index.php, and (with mod_headers) lets browsers cache the
built files and uploads.
Web server settings (Nginx)#
Nginx does not read rules files, so your server administrator adds the site's settings once.
Change the PHP-FPM socket to the one of your PHP 8.3 installation, and client_max_body_size to the
largest upload you allow.
server {
    listen 80;
    listen [::]:80;
    server_name example.com;
    root /var/www/shaunsocial/public;
    index index.php;
    charset utf-8;

    client_max_body_size 100m;

    add_header X-Frame-Options "SAMEORIGIN";
    add_header X-Content-Type-Options "nosniff";

    # No $uri/ here: addresses such as /admin and /install must reach ShaunSocial,
    # not the folders of the same name inside public/.
    location / {
        try_files $uri /index.php?$query_string;
    }

    location = /favicon.ico { access_log off; log_not_found off; }
    location = /robots.txt  { access_log off; log_not_found off; }

    error_page 404 /index.php;

    location ~ \.php$ {
        fastcgi_pass unix:/run/php/php8.3-fpm.sock;
        fastcgi_param SCRIPT_FILENAME $realpath_root$fastcgi_script_name;
        include fastcgi_params;
        fastcgi_read_timeout 300;
    }

    location ~ /\.(?!well-known).* {
        deny all;
    }
}
ln -s /etc/nginx/sites-available/shaunsocial.conf /etc/nginx/sites-enabled/
nginx -t
systemctl reload nginxnginx: the configuration file /etc/nginx/nginx.conf syntax is ok
nginx: configuration file /etc/nginx/nginx.conf test is successfulKeep $uri/ out of try_files: with it, the addresses /admin and
/install answer "403 Forbidden".
Hosting that cannot use the public folder#
Some shared hosting always shows the main folder and does not let you choose public. ShaunSocial
still works there: the package includes a rules file for that case. Use it only if you have no other choice, and
afterwards check that private files cannot be opened. Open each of these addresses in your browser:
https://example.com/.envhttps://example.com/composer.jsonhttps://example.com/storage/logs/andhttps://example.com/storage/logs/laravel.log(the site's log files)https://example.com/vendor/autoload.php
What you should see: an error page for every address (for example 403 Forbidden), never
the content of a file and never a download. The rules file in 1.5.7 and later answers with an error page; an older
one may show your site's own page instead, which is also safe. If you see a file's content, or your browser
downloads a file, move your site to hosting where the document root can be the public folder.
HTTPS#
- Install an HTTPS certificate for your domain; many control panels offer a free one (Let's Encrypt).
- Open the installer at your final
https://address: the installer saves the address you use as your site's address.
- On a site served over HTTPS, add
SESSION_SECURE_COOKIE=trueto.envafter installing, so sign-in cookies travel over HTTPS only. Do not add it while the site is still reached over plain HTTP: nobody could sign in. - When HTTPS ends at a load balancer or proxy in front of the server, add
FORCE_HTTPS=trueto.envso the links the site creates start withhttps://. - Behind Cloudflare the site reads the visitor's address from the
CF-Connecting-IPheader, behind another proxy fromX-Real-IP. Make sure the proxy sends one of them, or all visitors share the proxy's address. The IP address ban and the login lockout do not use these headers: they always see the address that connects to the web server, which behind a proxy is the proxy's. Block abusive visitors and limit repeated sign-in attempts in the proxy or CDN. - The site accepts those two headers from any sender. Let the server be reached only through your proxy (block direct access with a firewall), otherwise a visitor can fake the address the site sees.
Install ShaunSocial in your browser#
Last updated: 2026-11-17 · v1.5.6
Until the last step is done, anyone who opens your site sees the installer and could finish it with an admin account of their own. Run all the steps right after uploading the files.
Have your database details ready. Then open your site at its final address, for example
https://example.com.
What you should see: the installer opens by itself on its first screen,
Server Requirements (address /install/requirements).
- Server Requirements. The screen lists the PHP version (8.3.0 required), ten PHP extensions,
two folder permissions (755) and five folders that must be writable.
What you should see: a green tick on every line and a Set Environment button at the bottom. The button only appears when everything is green. If a line is red, ask your host to fix it, then reload the page.
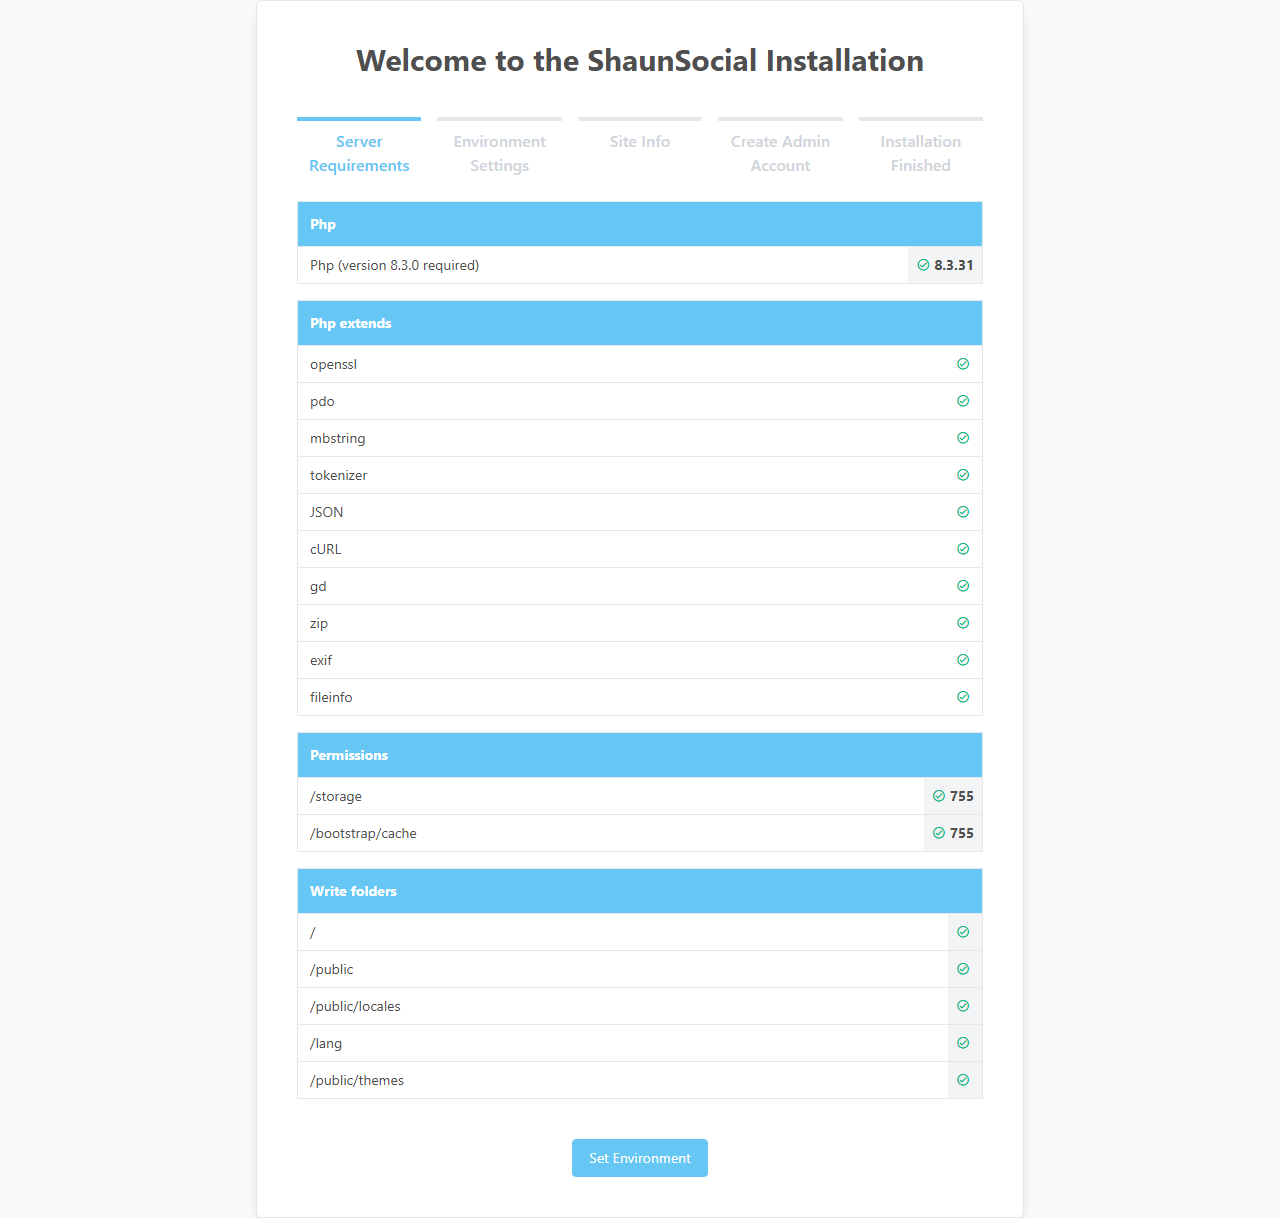
Step 1, Server Requirements, every line ticked. Screenshot taken 2026-11-17. - Environment. One field, Admin Prefix (filled with
admin). It decides the address of your admin panel, the AdminCP: withmyadminit will behttps://example.com/myadmin. Use letters, digits, dashes or underscores, up to 50 characters. A name other thanadminmakes your admin panel harder for strangers to find. Click Setup Database.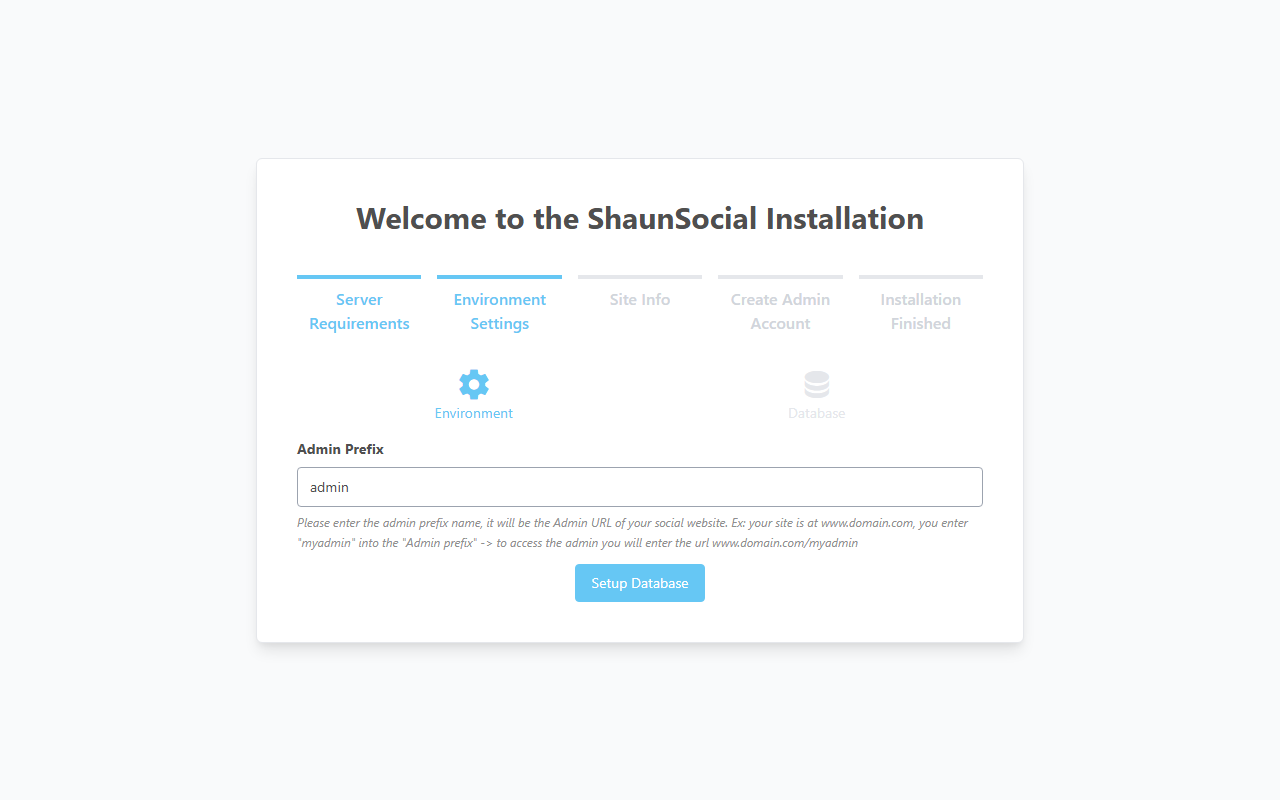
Step 2, tab Environment, the Admin Prefix field. Screenshot taken 2026-11-17. - Database. Fill in the database you created:
Click Install.
Field Already filled with Enter Database Connection mysqlleave it on mysql(the other choices do not work with ShaunSocial)Database Host 127.0.0.1your database host Database Port 3306usually leave it Database Name (empty) your database name Table Prefix (empty) leave empty, unless the database is shared with another application (then for example shaun_)Database Username (empty) your database user Database Password (empty) <your-db-password>What you should see: the button changes to Installing... while the installer creates and fills the database; this can take a few minutes. Then the next screen opens. If the details are wrong you see "Could not connect to the database." instead.
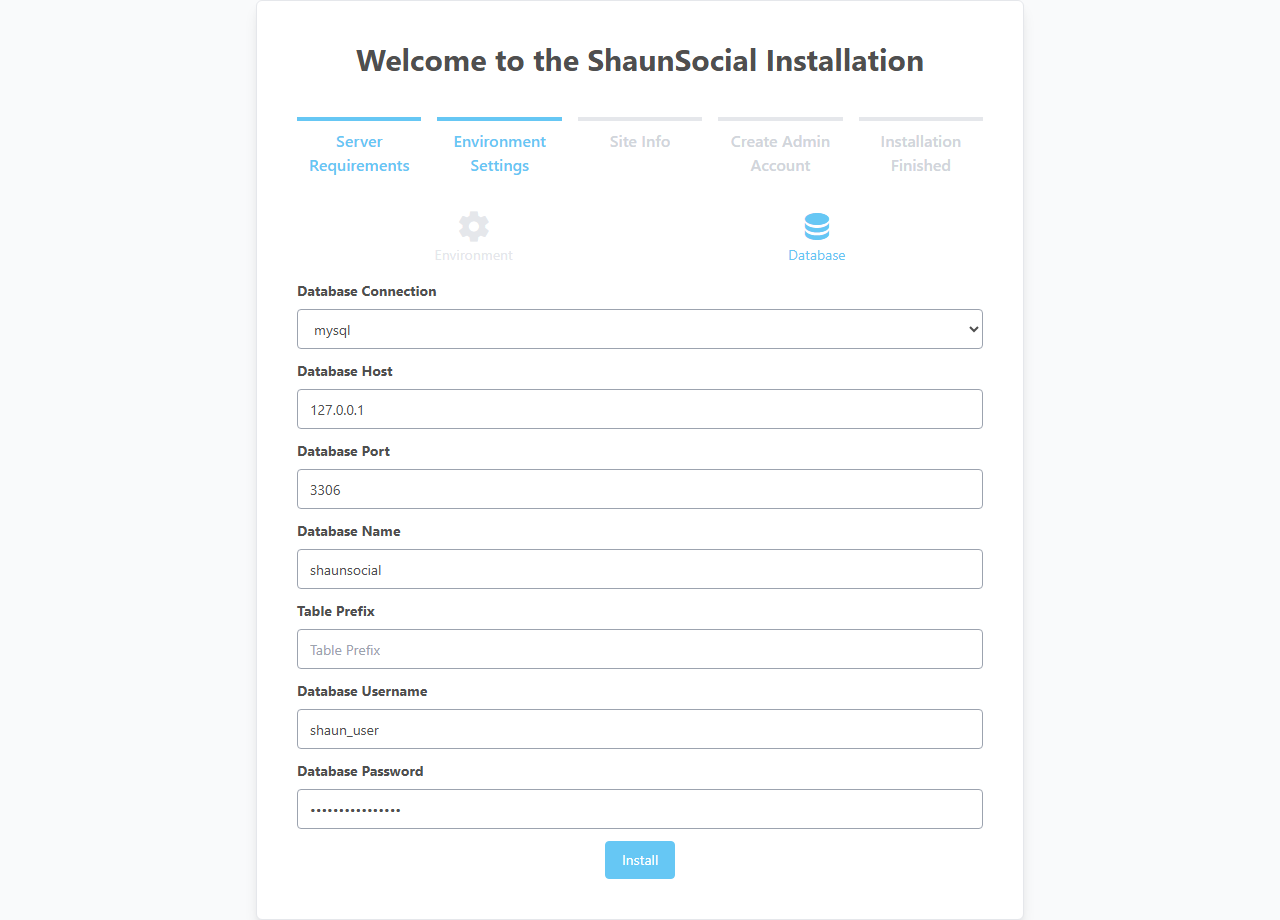
Step 2, tab Database, filled with placeholder values. Screenshot taken 2026-11-17. - Site Settings. Three fields; you can change them later in AdminCP → Site Settings → Site
Information. Your site's address is saved here too, without a field: the installer takes the address you opened it
at.
Click Next.
Field What to enter Site title the name of your community (up to 100 characters); it appears in the browser tab Site email your site's e-mail address (up to 50 characters); messages from the contact form go here, and it is the sender of your site's e-mails until you set another one Timezone default your site's time zone ( Europe/Londonuntil you change it); your admin account gets it tooIf HTTPS on your site is handled by a proxy or CDN in front of your server (for example Cloudflare), the saved address may start with
http://. After installing, check Site url in AdminCP → Site Settings → Site Information and correct it tohttps://.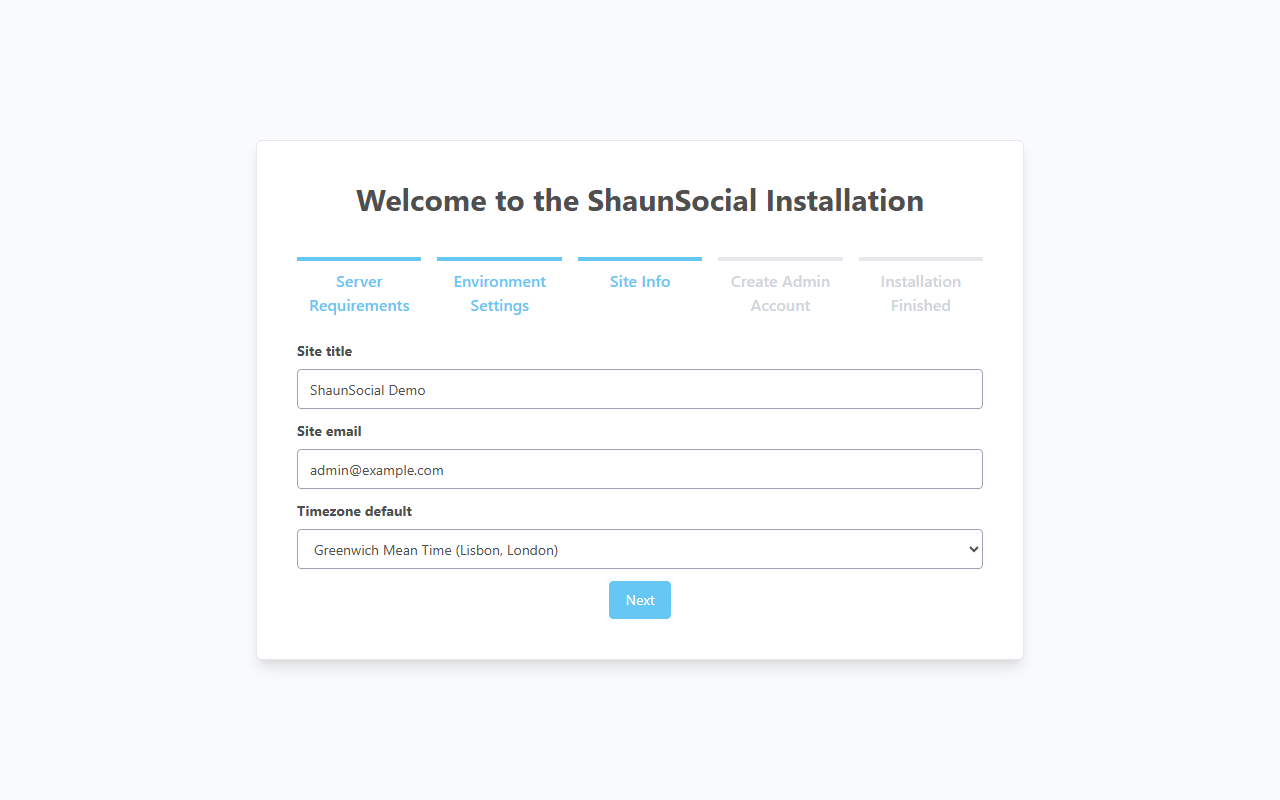
Step 3, Site Settings. Screenshot taken 2026-11-17. - Create Admin Account. Enter Name, Email, Password and Confirm
Password (each up to 50 characters). This account becomes the super admin of your site (the root account, see
Root, super admin and moderator), with the user name
admin. Choose a strong password: the form accepts even a very short one. Click Save.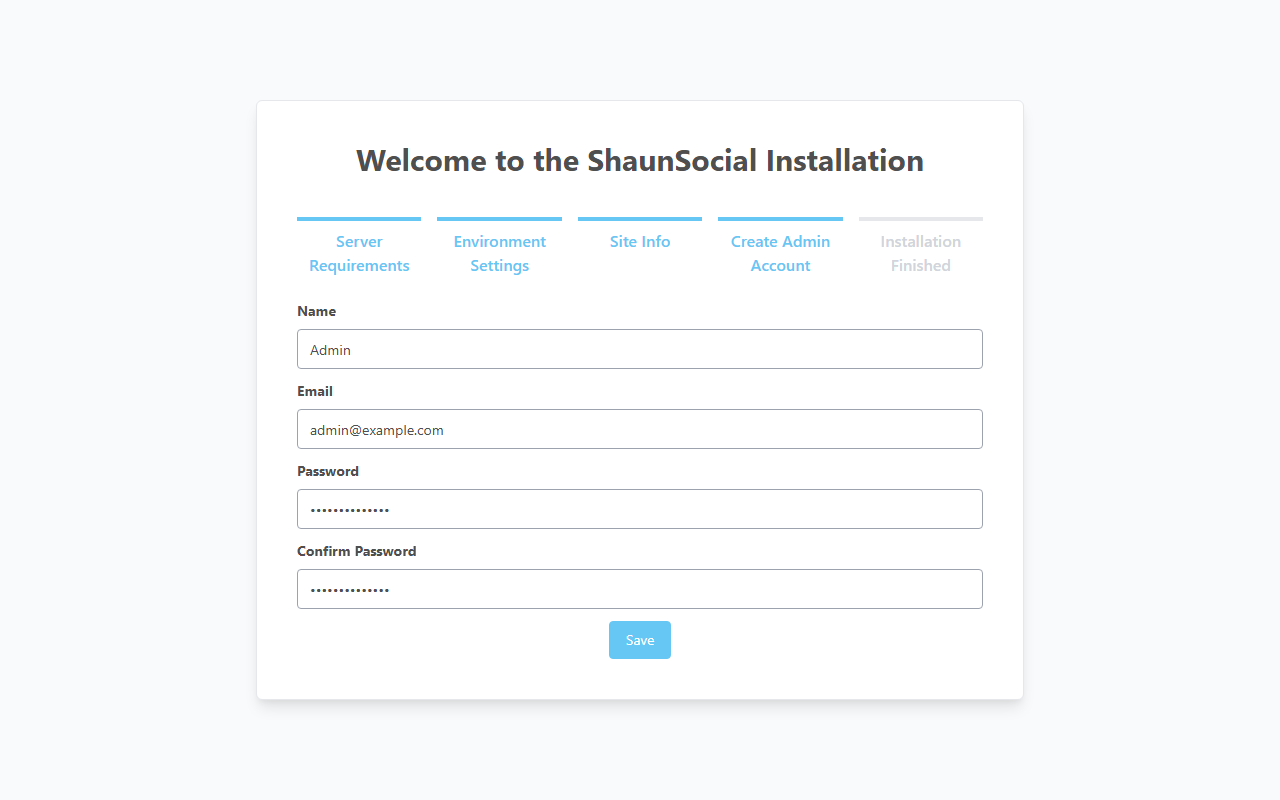
Step 4, Create Admin Account. Screenshot taken 2026-11-17. - Installation Finished.
What you should see: the screen Installation Finished with a Go to Home Page button. Click it to open your new site. From now on the installer is closed:
/installshows "Not found".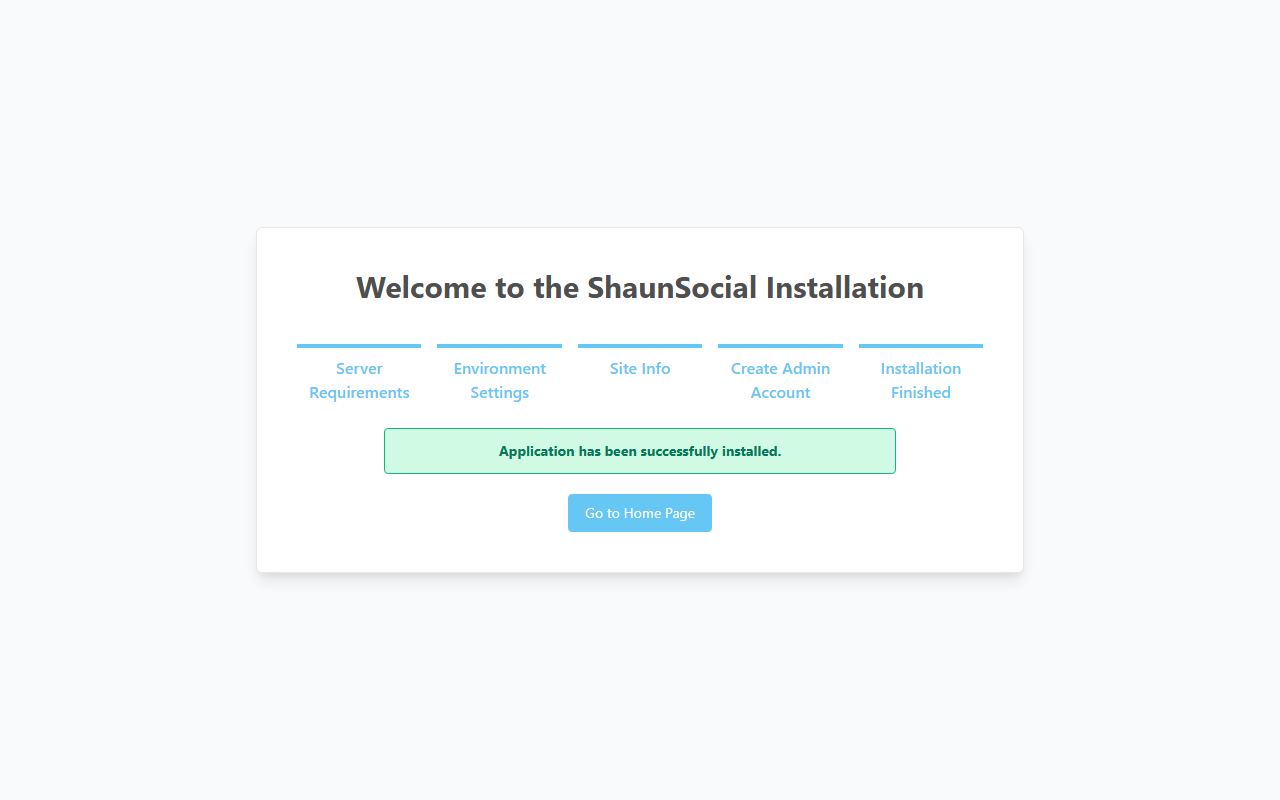
Installation Finished, with the Go to Home Page button. Screenshot taken 2026-11-17.
| Key | Value |
|---|---|
APP_KEY, APP_NAME | new random values for this site |
APP_ENV, APP_DEBUG | production, false |
APP_ADMIN_PREFIX | the admin prefix entered on the Environment screen |
APP_URL | the site address saved on the Site Settings screen |
LOG_CHANNEL, LOG_LEVEL | shaun, warning: errors go to storage/logs/shaun-error-YYYY-MM.log |
DB_* | the database form; DB_PREFIX is the table prefix |
CACHE_DRIVER, SESSION_DRIVER, QUEUE_CONNECTION | file, database, database |
MAIL_* | placeholders only: e-mail is set in the AdminCP |
VIDEO_NO_NEED_CONVERT_MP4 | true: MP4 videos are used as uploaded |
ADMIN_SHOW_MANAGE_MESSAGE | true: the AdminCP menu item and page Message → Manage Message Logs exist only while this is set |
FORCE_HTTPS, CDN_CLOUD_URL, SQL_LOG_ENABLE, SERVER_FFMPEG_THREADS | empty. SQL_LOG_ENABLE logs every database query (for debugging only); SERVER_FFMPEG_THREADS limits the threads FFmpeg uses |
The installer also creates the key pair the site uses when it acts as an OpenID provider, letting other sites
sign people in with accounts from your site (storage/oauth-private.key), the public/storage
link and the English language files, and sets a random API Secret Key.
Checked against the 1.5.6 installer; screenshots follow.
Install from the command line#
Last updated: 2026-11-17 · v1.5.6
The same result as the browser installer, for server administrators who set up sites with scripts or containers. Prepare the hosting first (Prepare your hosting).
Run these in the site folder, as the user PHP runs as.
- Create the settings file and edit it:
Setcp .env_example .envAPP_ENV=production,APP_DEBUG=false,APP_URL=https://example.com,APP_ADMIN_PREFIX,LOG_CHANNEL=shaun,LOG_LEVEL=warning,SESSION_DRIVER=database,QUEUE_CONNECTION=databaseand theDB_*lines (the example file points at a database host calledmariadb). - Give the site its own key (the example file's key is the same in every package):
php artisan key:generate --forceINFO Application key set successfully. - Create the database tables, in this order:
php artisan migrate --force --path=/database/migrations
php artisan migrate --force --path=/packages/shaunsocial/core/database/migrations
php artisan migrate --force
What you should see: each command lists what it creates and ends without an error (371 steps in all).
- Fill the database, save the site settings and create the admin account. Always give all four values; without
them the command uses the address
http://localhostand the admin loginadmin@admin.com/admin.php artisan shaun_core:install "My Community" "https://example.com" admin@example.com '<admin-password>'What you should see: nothing; the command is silent when it succeeds. If
APP_URLin.envis set (and is nothttp://localhost), it is used as the site address instead of the second value. The admin account is named Admin, with the user nameadmin, and the admin e-mail also becomes the Site email; change it later in AdminCP → Site Settings → Site Information. - Create the key pair the site uses when it acts as an OpenID provider (the browser installer does this itself):
php artisan shaun_core:oidc_keys_generate --forceOIDC keys generated successfully.
Then continue with After installing.
Checked against the 1.5.6 installer; screenshots follow.
Install with Docker#
Last updated: 2026-11-17 · v1.5.6
The 1.5.6 package does not include a Docker setup. If your sites run in Docker containers, your server administrator builds an image with PHP 8.3 and installs ShaunSocial into it, in the browser or from the command line.
| Need | Detail |
|---|---|
| PHP 8.3 FPM | with the extensions listed above and the upload limits |
| Web server | Nginx with the settings above, fastcgi_pass pointing at the PHP container |
| Database | MySQL or MariaDB, an empty utf8mb4 database |
| Scheduler | php artisan schedule:run every minute, as the PHP user |
| Queue worker | only with SHAUN_QUEUE=true (Background queue) |
| Live updates | optional: php artisan reverb:start (Live updates) |
| Persistent storage | .env, storage/, lang/, public/locales/, public/themes/; with plugins also the plugin folders of Let the site write its folders and bootstrap/cache/shaun_plugins.json |
Container environment variables work like .env lines, but a .env file must always exist in
the site folder: without it the installer opens again, for anyone.
After installing: first steps#
Last updated: 2026-11-17 · v1.5.6
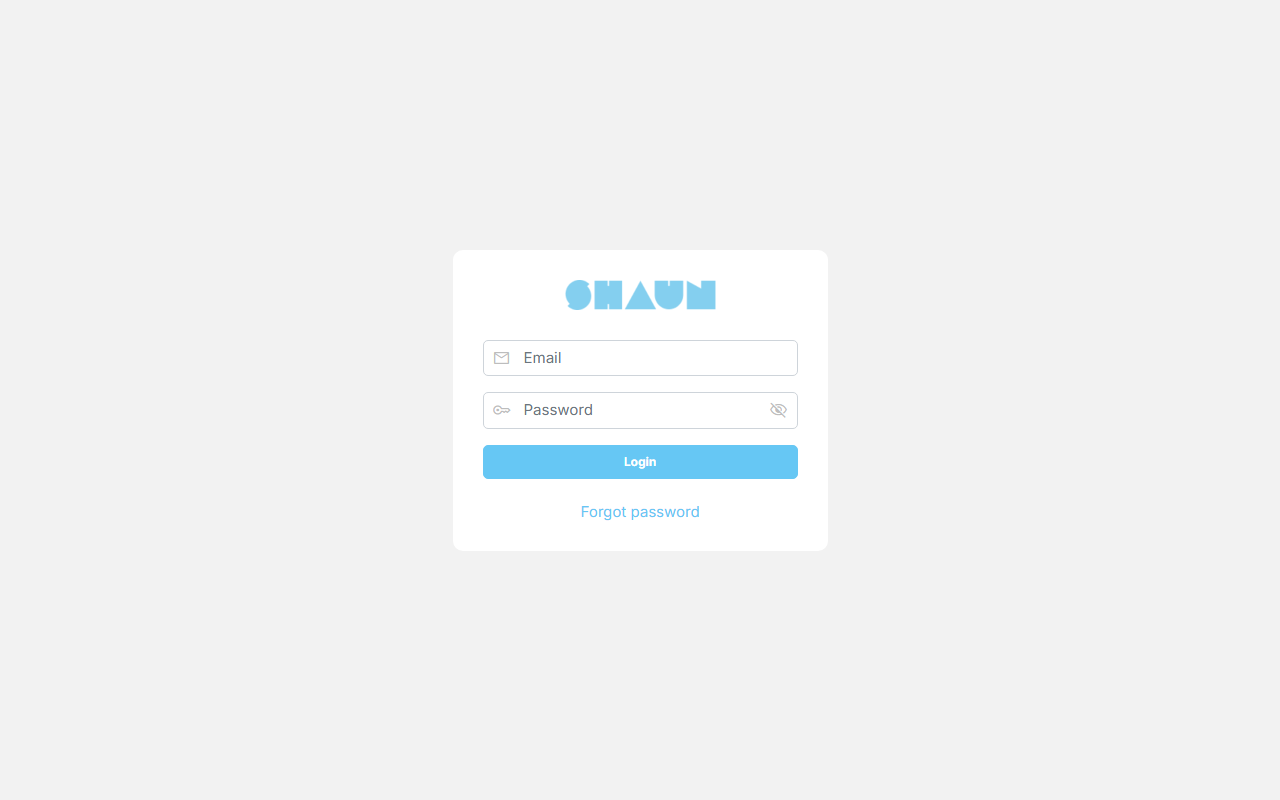
Sign in to the AdminCP#
- Open
https://example.com/<prefix>/login, with the admin prefix you chose (for examplehttps://example.com/admin/login). - Sign in with the admin account you created.
What you should see: the AdminCP dashboard (
/<prefix>/dashboard).
Set up the cron job (required)#
A cron job is a task your server runs on a timetable. ShaunSocial needs one that runs every minute: it sends queued e-mails, cleans up old data, renews subscriptions and builds the sitemap. Without it these things silently stop.
- In the AdminCP open System Setting → Tasks. The box at the top shows the exact command for your site, with its real folder, in two forms: for a server with a command line (VPS) and for cPanel.
- In your hosting control panel open Cron Jobs, choose Once per minute (
* * * * *), paste the command, and save. - Wait five minutes and reload the Tasks page.
What you should see: Succeeded: last on ... with a recent time. If it still says No, cron job configuration is not correct., the cron job is not running.
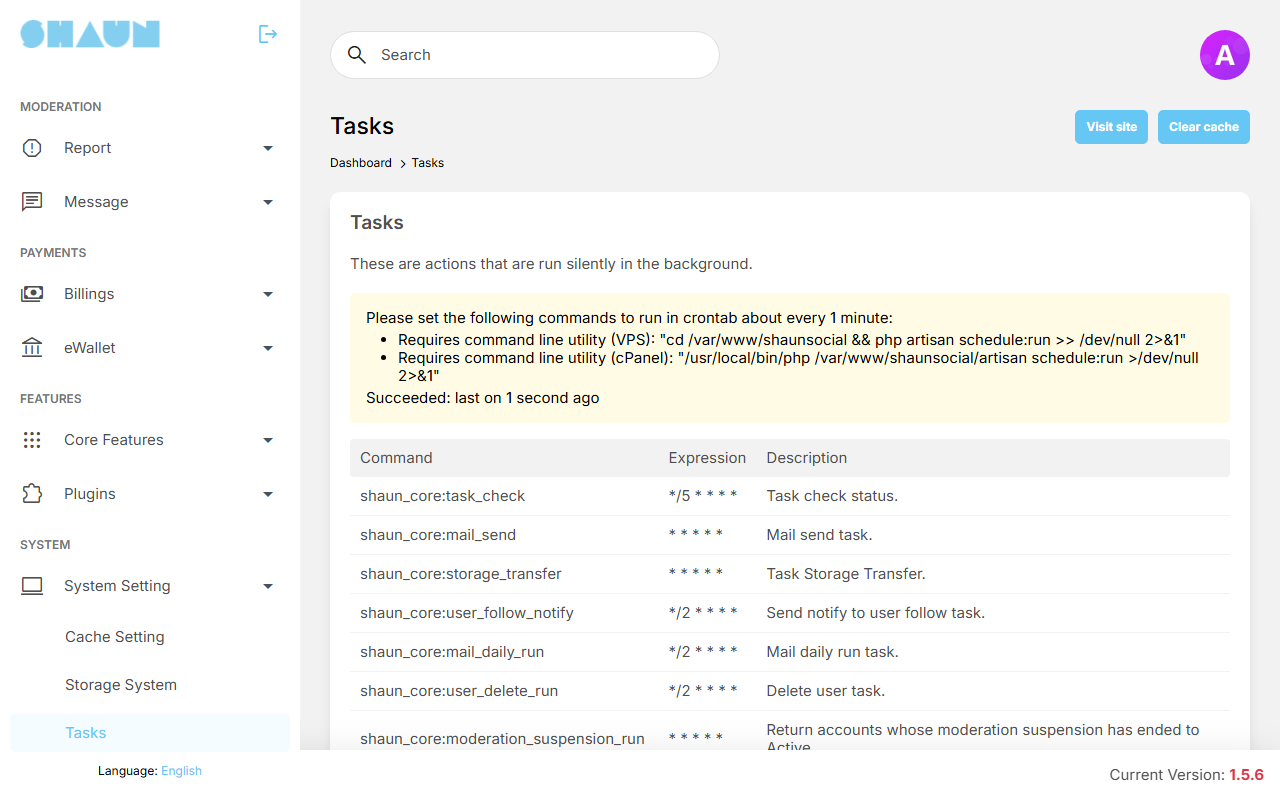
crontab -u www-data -e* * * * * cd /var/www/shaunsocial && php artisan schedule:run >> /dev/null 2>&1The Tasks page lists all 32 scheduled jobs with their timing. Its check job runs every five minutes.
Set up e-mail#
- Open AdminCP → Site Settings → General Configuration → E-mail Settings.
- Mail engine is set to Mail: e-mails go out through your server's own mail program. To send through an e-mail account instead (usually more reliable), choose SMTP and fill in Hostname, Port, Username, Password and Encryption. Your e-mail provider gives you these values.
- Optionally set From name and From address. While they are empty, e-mails go out under your Site title and Site email.
With Email queue switched on, e-mails wait and are sent in batches each minute by the cron job (Mail count: 25 at a time). The complete e-mail guide, with the test button, is An outgoing e-mail account on the Server services page.
Failed sends are written to storage/logs/shaun-mail-YYYY-MM.log.
Live updates (optional)#
Live updates make new chat messages, comments and notifications appear without reloading the page. They need a "websocket" service: either a Pusher account (an online service) or a live-update service included with ShaunSocial that runs on your own server. Both are set in AdminCP → Site Settings → General Configuration → Broadcast (Enable, Id, Key, Secret, Cluster, Host, Port, Scheme, Force TLS). New comments on a post appear live only when, in addition, Enable real-time comment is ticked in AdminCP → Site Settings → General Configuration → General Settings (it is off after installing); see Live updates on the Server services page.
- Add these three lines to
.env, each with its own random value:PUSHER_APP_ID=<random-id> PUSHER_APP_KEY=<random-key> PUSHER_APP_SECRET=<random-secret> - Start Reverb and keep it running (for example with Supervisor). It listens on
127.0.0.1:6060; change that withREVERB_SERVER_HOSTandREVERB_SERVER_PORT. Put it behind your web server for publicwss://traffic.php artisan reverb:start - Enter the same three values as Id, Key and Secret in the Broadcast settings.
The web server proxy and testing are in Run Reverb on your server.
If uploaded images do not show#
Uploaded photos and files are shown through a link the installer creates. If images do not appear (for example after moving the site), that link is missing: ask your server administrator to create it again. Files can also be stored in the cloud (Amazon S3 and similar): AdminCP → System Setting → Storage System.
Uploads live in storage/app/public and are served through the public/storage link.
Recreate it with:
php artisan storage:linkINFO The [public/storage] link has been connected to [storage/app/public].If you also run the ShaunSocial mobile apps#
The installer sets a random API Secret Key (AdminCP → Site Settings → General Configuration → General Settings). The ShaunSocial mobile apps use a key of their own. When you switch on any of the reCAPTCHA options under Spam & Banning Tools, the two keys must be the same, or members cannot sign in or sign up in the app. Before you switch reCAPTCHA on, enter your app's key there, and use an app version made for 1.5.6.
Background queue (large sites only)#
Normally your site sends e-mails and notifications straight away, and the cron job does the rest. A very busy site can hand that work to a background queue instead. Leave this off unless your server administrator sets it up.
Add SHAUN_QUEUE=true to .env, and run a worker that serves all five queues (a queue
nobody serves holds its work forever, without an error):
php artisan queue:work --queue=mail_normal,notification,broadcast,post_queue,mail_many --tries=3| Queue | What waits without a worker |
|---|---|
mail_normal | password resets, verification codes, every single e-mail |
mail_many | invitations, subscription e-mails, bulk e-mail campaigns |
notification | notifications, chat message delivery |
post_queue | posts that are published in the background |
broadcast | nothing in 1.5.6 (live updates are sent straight away); listed so that every queue has a worker |
[program:shaunsocial-queue]
user=www-data
directory=/var/www/shaunsocial
command=php artisan queue:work --queue=mail_normal,notification,broadcast,post_queue,mail_many --tries=3
numprocs=1
autostart=true
autorestart=true
stopsignal=TERM
supervisorctl reread
supervisorctl updateDo not run php artisan config:cache or php artisan optimize on this version: afterwards
some settings stop working, for example the admin prefix (the AdminCP moves back to /admin) and
FORCE_HTTPS. If one of them was run, undo it:
php artisan config:clearThe first settings to make#
- AdminCP → Site Settings → Site Information: site title, description, logo, default time zone.
- AdminCP → Language → Manage Languages: add or edit the languages of your site.
- AdminCP → Site Settings → General Configuration: Max upload size per file (Mb) under General Settings, reCAPTCHA under Spam & Banning Tools.
- AdminCP → Static Page → Manage Static Pages: Terms of Service, Privacy Policy, About us.
- AdminCP → Design → Manage Menus and Layout Editor.
If something goes wrong#
Last updated: 2026-11-17 · v1.5.6
| What you see | What to do |
|---|---|
| The installer's first screen does not show a Set Environment button | At least one line is red. Ask your host to install the missing PHP extension or fix the folder permission, then reload the page. |
| "Could not connect to the database." when you click Install | Check the host, port, database name, user name and password. The database must exist already. If everything is right, ask your host whether the PHP extension pdo_mysql is installed. |
| "An error has occurred!" after Install, with a database message | The database was probably not empty. Empty it (delete all its tables) in your control panel, then open your site again: the installer starts over. |
| Every page except the home page shows "Not found" (Apache) | The hidden file public/.htaccess is missing, or Apache does not read it. Upload it again; ask your host to allow .htaccess files. |
| Uploaded images do not show | See If uploaded images do not show. |
| Big uploads fail | Ask your host to raise the upload limits (see Check that your hosting is ready). |
| An iPhone photo (HEIC) is refused: "The <file name> is in a format that we don't support." | Ask your host to install the PHP extension imagick, or upload JPEG or PNG photos. |
| The Tasks page says No, cron job configuration is not correct. | See Set up the cron job; wait five minutes after any change. |
| No e-mails arrive | Check AdminCP → Site Settings → General Configuration → E-mail Settings with your e-mail provider's values. |
| Chat and notifications only update after reloading | Live updates are off or not set up; see Live updates. |
| The mobile app cannot sign in or sign up, while the website can | See If you also run the ShaunSocial mobile apps. |
Look first at storage/logs/shaun-error-YYYY-MM.log (one file per month), or at the web server's
error log when PHP does not start at all.
| Symptom | Fix |
|---|---|
The first installer page answers 500; the log says Please provide a valid cache path. | Part of storage/ was not uploaded. Upload the whole storage/ tree, or create storage/framework/cache/data, storage/framework/sessions, storage/framework/views, storage/framework/testing, storage/app/public, storage/download_data, storage/logs and storage/tmp, writable by PHP. |
Every page answers 500 with The bootstrap/cache directory must be present and writable. | Give bootstrap/cache/ to the PHP user (Let the site write its folders). |
/install shows "Not found" | The site counts as installed (.env exists). For a fresh install, start with an empty database and no .env. |
Every address goes to /install/requirements on a site that was installed | .env is missing, or the file storage/installed is still there. Restore .env; delete storage/installed only if the installation really finished. |
The AdminCP is not at your admin prefix, or appears at /admin | php artisan config:clear (see "no configuration cache" above). |
/admin or /install answers 403 (Nginx) | Remove $uri/ from try_files (Nginx settings). |
| Uploads fail with 413 | Raise client_max_body_size (Nginx) and upload_max_filesize / post_max_size (PHP). |
| Live updates with Reverb never arrive | Check the three PUSHER_APP_* lines in .env, restart Reverb, and compare them with the Broadcast settings (Live updates). |
| E-mails fail | Read storage/logs/shaun-mail-YYYY-MM.log. |
Change log#
Last updated: 2026-11-17 · v1.5.6
| Date (GMT+7) | Section | What changed |
|---|---|---|
| 2026-11-17 | all | First version for 1.5.6, written from the 1.5.6 code as a guide for site owners, with server commands in boxes for the server administrator. |
| 2026-11-17 | requirements, web-installer, cli-install, after-install | Corrections after review: MariaDB 10.3 or newer, installer screens named as on screen, the OpenID key pair explained, the live-update service and upload storage wording, the broadcast queue row. |
| 2026-11-17 | server-setup, web-installer | The IP ban and login lockout behind a proxy; a link to the explanation of the root account. |
| 2026-11-17 | overview, requirements, after-install | FFmpeg is needed for every video upload and for voice messages; links to the Server services page for e-mail and Reverb. |
| 2026-11-17 | after-install | Live comments also need the Enable real-time comment switch. |
| 2026-11-18 | server-setup | Hosting that cannot use the public folder: the check now also opens the log folder, a log file and vendor/autoload.php. |