ShaunSocial user guide 1.5.6 / AdminCP
Languages and translation
Your site can speak several languages. This page explains how to add a language and choose the default one, how to change any text of the website (a button, a heading, the copyright line), how to translate the names you create yourself (menu items, categories, block titles), and how to let members translate posts and messages into their own language.
Manage languages#
Last updated: 2026-11-17 · v1.5.6
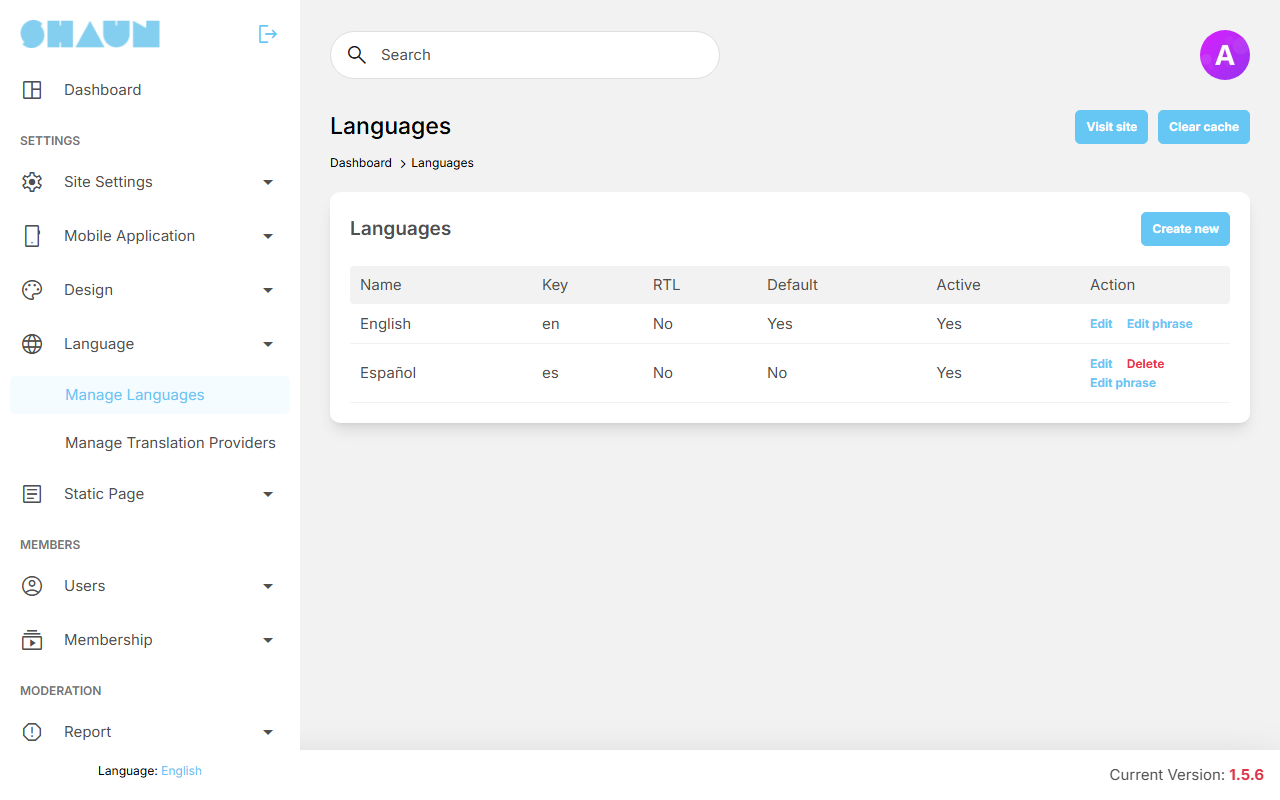
The list shows every language of your site with its Name, Key (the two-letter language code), RTL, Default and Active, and the actions Edit, Delete and Edit phrase. After installing there is one language, English, which is the default.
Add a language#
- Open AdminCP → Language → Manage Languages and click Create new.
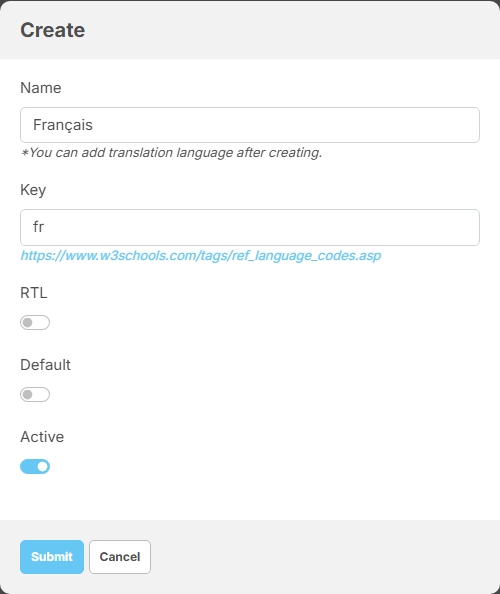
- Fill in the fields:
Field What it does Name the name members see in the language list, for example Français(required). After saving you can give it a name in each language with TranslateKey the two-letter code of the language, for example frfor French orarfor Arabic (required, exactly two letters, see the list of codes linked under the field). It cannot be changed laterRTL turn on for a language written from right to left, such as Arabic or Hebrew: the whole site is then laid out from right to left for members who use it Default make it the language of visitors and of members who never chose one. Turning it on also turns Active on and locks it Active show it to members. Leave it off (and Default off) while you translate - Click Submit.
What you should see: "Language has been created." and the new language in the list.
- Translate it: click Edit phrase (see Change the texts of the website), then the texts listed below.
- When the translation is ready, click Edit, turn on Active and click Submit.
A new language starts in English: its phrases are ShaunSocial's original English phrases (not the English phrases you may have reworded), and every name and text you can translate elsewhere in the AdminCP is a copy of your current English one. Besides the phrases, translate these in the new language:
- the e-mails: Edit a template, one box per language;
- your static pages: Create or edit a page, choose the language;
- the names you created: menu items, block titles, page names, categories and the other names with a Translate link (see Translate a name or text).
Change the default language#
- Click Edit next to the language that should become the default.
- Turn on Default and click Submit.
What you should see: when you turn on Default, Active turns on too and can no longer be switched off in the window. After Submit, the list says Yes under Default for that language only.
- The Default switch of the current default language cannot be turned off: make another language the default instead.
- Keep the default language active. Before you switch a language off, make another one the default.
- While only one language is active, its Active switch is not shown.
- Delete is offered for every language except English and the default language. It asks you to confirm. Members who used a deleted language see the default language.
- Members whose language you switch off also see the default language until you switch it on again.
How members choose a language#
Members and visitors click the language button in the footer of the website (a globe icon with the name of the current language), or in the footer of the landing page, and pick one of the active languages. A member's choice is saved in their account and also decides the language of the e-mails they receive; a visitor's choice is remembered by their browser. Everyone who never chose sees the default language.
You choose the language of the AdminCP for yourself with Language at the bottom of the AdminCP menu.
Editing phrases and per-item translations#
Last updated: 2026-11-17 · v1.5.6
The texts of your site come from two places:
- Phrases: every fixed text of the website (buttons, headings, messages, the texts of the designed landing page, the copyright line). You change them per language with Edit phrase. Changing an English phrase is also how you reword a text on an English-only site.
- Names you create: menu items, block titles, categories and the like. Each has a Translate link where you enter it in every language.
The ShaunSocial mobile apps carry their own texts, which are not edited here.
Change the texts of the website#
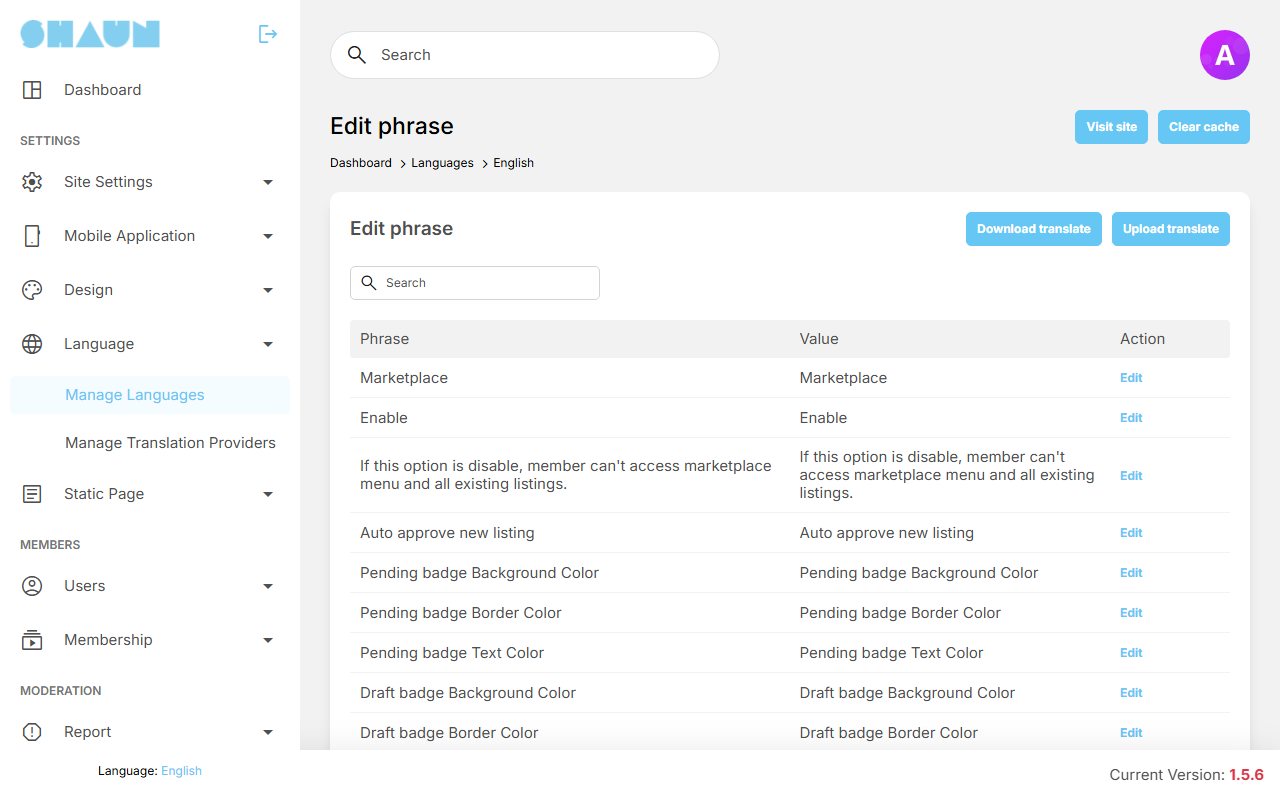
- Open AdminCP → Language → Manage Languages and click Edit phrase next to the language.
What you should see: a list with Phrase (the original English text), Value (the text your site shows in this language) and an Edit link on each row.
- Type a few words of the text in Search. The list keeps the rows whose phrase or value contains them.
- Click Edit on the row, change the text and click Save.
What you should see: the new value in the row. Members see it on their next page load; press Ctrl+F5 to see it yourself at once.
Keep the words in square brackets or after a colon exactly as they are, for example [siteName],
[year] or :count: they are replaced by real values. For example, the copyright line in the
footer is the phrase Copyright © [year] [siteName], and the title of the app box on the landing page is
Check out our mobile apps!.
If plugins are installed, a list next to Search chooses whose phrases you see: Core (ShaunSocial itself) or one plugin. A text you cannot find under Core may belong to a plugin.
Translate many phrases at once with a file#
To translate a whole language, or to have a translator do it, work in a file:
- On the Edit phrase screen, choose Core or the plugin in the list, then click Download
translate.
What you should see: your browser saves a
.jsonfile with all phrases of that language. - Open the file in a plain text editor (not a word processor). Each line looks like
"Site Information": "Site Information",. Change only the text after the colon; never change the part before it, the quotes or the commas. - Click Upload translate, check the Source, choose the file in File Json and click
Submit.
What you should see: "Phrase has been successfully updated." If the file has a mistake you see "The file is in an incorrect format." and nothing is changed: check the quotes and commas near your changes.
- Click Clear cache at the top of the AdminCP (see Clearing the cache) so members get the new texts.
Only phrases that already exist are updated; lines with an unknown phrase are ignored. An upgrade adds the new phrases of the new version in English and keeps your translations.
Translate a name or text#
The names you create in the AdminCP are stored once per language. Once such an item is saved, its name field can no longer be typed over; a Translate link appears under it instead:
- Open the item (for example Edit on a menu item) and click Translate under the field.
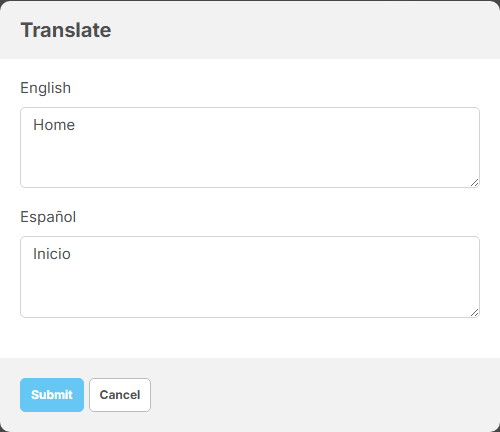
What you should see: a window with one box per language of your site. The window opens only for admins whose role may manage languages (the Manage Languages permission; super admins always can).
- Fill in the box of each language and click Submit. A name cannot be left empty in any language.
What you should see: "Translation has been successfully updated."
You find Translate on: menu items, block titles and Html Block content in the layout editor, layout page names, language names, genders, countries, states and cities, report and content warning categories, two-factor methods, the warning messages of role permissions, membership packages and plans, and the categories of groups, events, business pages and Marketplace (with the Marketplace attributes and values). Mail templates and static pages are translated in their own forms instead.
Auto-translating member content#
Last updated: 2026-11-17 · v1.5.6
When this is on, members see See translation under posts, comments, replies and chat messages written by other people. Clicking it shows the text translated into the language the member uses on your site. The translation is made by Google's translation service, with an API key from your own Google account; Google charges for it by the amount of text translated (see Google's pricing).
Switch it on#
- In your Google Cloud account, enable the Cloud Translation API for a project and create an API key for it. Google asks for a billing account.
- Open AdminCP → Language → Manage Translation Providers. The list has one provider, Google, with Default Yes. Click Edit.
- Paste the key into Api key and click Save Changes.
What you should see: "Your changes have been saved."
- Open AdminCP → Site Settings → General Configuration → Auto translate settings and tick Enable ("Enable auto translate for post, comment, reply and message"). It is off after installing and saves itself.
- Sign in as a member whose language differs from the language of a post, and click See translation under
it.
What you should see: the translation below the text, and Hide translation to close it. "API key not valid. Please pass a valid API key" means the key is wrong or not allowed to use the Translation API.
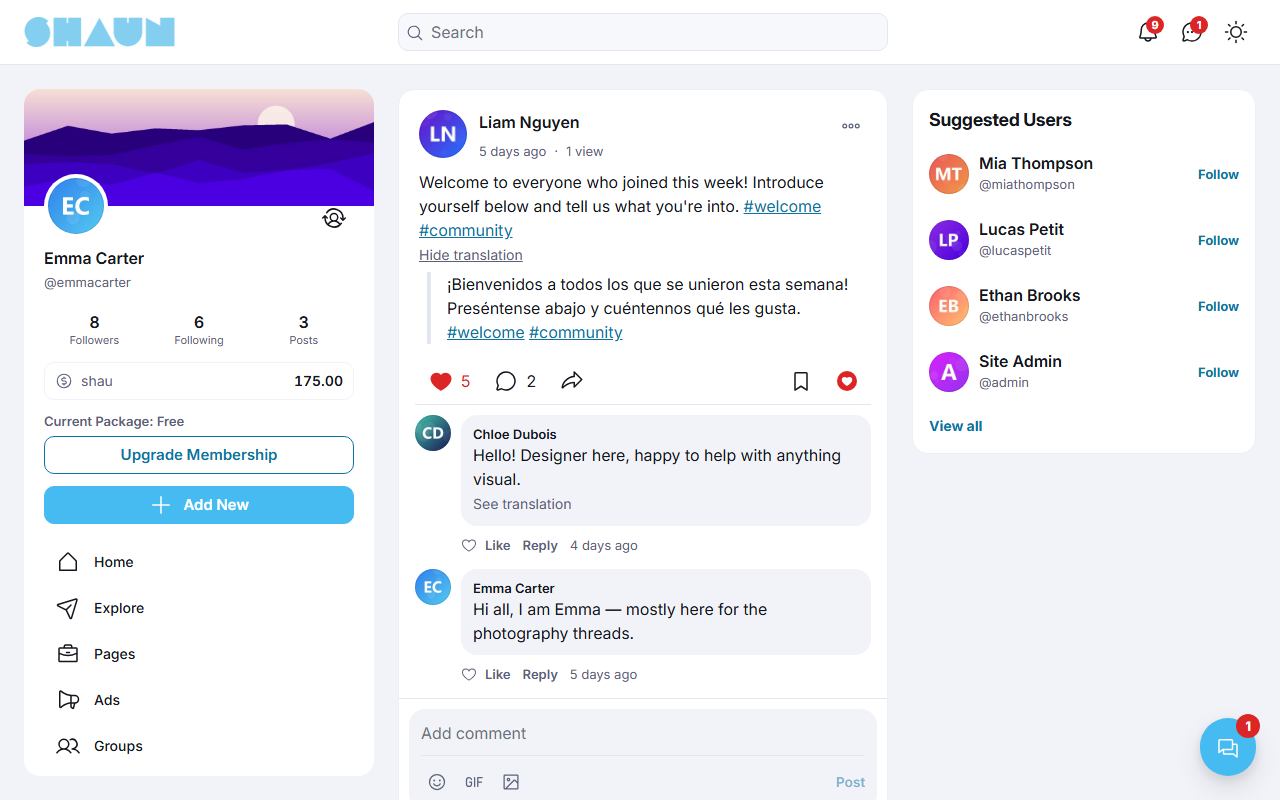
What members see#
- See translation appears under text written by someone else, when there is text to translate. Visitors who are not signed in see it on public posts and comments too; clicking it takes them to the sign-in page.
- The text is translated into the language the member chose on your site (see How members choose a language), each time they click.
- Switching Enable off removes the link everywhere.
Change log#
Last updated: 2026-11-17 · v1.5.6
| Date (GMT+7) | Section | What changed |
|---|---|---|
| 2026-11-17 | manage-languages, edit-phrases, auto-translate | Corrections after review: what Default does to Active, what a new language starts with, members of a switched-off language, the footer language button, Clear cache after an upload, who may open the Translate window, See translation for visitors. |
| 2026-11-17 | all | First version for 1.5.6, written from the 1.5.6 code. The steps were read from the code and the screens; adding a language and translating with Google were not run on a live site. |